Showing posts with label Favorites. Show all posts

Monday, April 16, 2012

Irish Beef Pies

I love Martha Stewart freezer recipes. I think all of her recipes are great, but they are always so involved, so when a good/simple one comes along, I embrace it. These Irish Beef Pies are easy to make ahead and serve for dinner during the week. There are great ways to enhance this recipe by adding garlic or paprika. But this is the traditional "Irish" pie recipe. I also would want to add onions or corn. Maybe some other veggies like carrots or celery but that's your call. Great recipe, makes 8 at a time. 


Ingredients:
1 tbsp vegetable oil
1 head of cabbage (won't need all of it)
1 lb ground beef sirloin
1/2 lb red potatoes
1 tbsp of tomato paste (you can use more, but i'm not a fan)
1 tsp Worcestershire sauce
1 cup of water
1/2 tsp thyme
salt & pepper
2 pie crusts 

Directions:
Preheat oven to 400 degrees.
Shred the cabbage and cut the potatoes into tiny cubes.
In a sauce pan heat oil over medium heat.
Add cabbage & potatoes.
Cook for about 8 minutes until brown.
Then add beef and break up while cooking.
When they are no longer pink stir in tomato paste, worcestershire sauce, thyme, & water.
Cover, lower heat, and cook for about 15 minutes.
The potatoes need to be soft enough to mash.
After mashing with a fork season with salt & pepper.
Meanwhile, stretch out the pie crusts and split into 4 sections (use a pizza cutter).
Ideally you would want to make it more of a square then a circle, but I don't have time for that.
Place about 1/2 a cup of the filling on each square and seal up.
Crimp edges with a fork (if you're talented).

To Eat Now: Transfer pies to rimmed baking sheet (lined with foil) and bake for about 10 minutes or until golden brown. You can rotate the pies after 5 minutes for even cooking.

To Freeze: After the insides cool, wrap in tin foil and place in freezer bags. I kept them in my freezer for about a month and used them regularly. No defrosting needed. 

To Eat From Freezer: Bake at 400 degrees for about 30 minutes on a foil-lined rimmed baking sheet.


BEFORE BAKING:


 AFTER BAKING:


Nutritional Information:


Carbs: 7.5
Calories: 362
Fat: 20
Points: 8.6
Points Plus+: 10


What do you think? Comments? Suggestions? I would love to know that you visited my blog. Please leave me a message letting me know you were here! Did you try out a recipe? Let me know! I would love to hear from you :-)

Saturday, April 14, 2012

Wasabi Guinness Chilli


As previously posted, cooking with beer is amazing. It really enhances the flavor of every dish you can think of. From veggies to dessert, it is YUMMY. I enjoy experimenting with chili, I make it often and never make it the same way twice. Found this awesome recipe from AllRecipes.com that I used to inspire my chili dish for cooking club at the end of last year. It was so so so so so so good. I can't stop raving about it. Secret Ingredient? Not the beer (though that was great), not the wasabi powder, (thought that made it kickin!) It was COFFEE!!!  All the crazy ingredients together make for a flavorful, exotic meal with a lot of kick. I dare you to use it for any chili kick-off you compete in.

I know that picture isn't that classy, but trust me...this dish was FANTASTIC.

Ingredients:
1-2 cups of diced onion
4-6 cloves of garlic, minced
1 lb of ground beef, extra lean
1 lb of spicy Italian sausage (remove from casing)
1 14.5 oz can of diced tomatoes, undrained
1 bottle (12 oz) of Guiness (or other dark beer)
1 cup of brewed coffee (I used some fancy Jack Daniels brew)
1 can beef broth
1/2 cup hot sauce
1/4 cup chili powder (or more)
1.5 tbsp wasabi powder
1 tbsp paprika
1 tbsp cayenne pepper
1 tbsp ground cumin
1/4 cup brown sugar
1 tsp oregano
2 tsp coriander (or ground coriander)
1 tsp salt
1 can kidney beans, dark red
1 can kidney beans, light red
1 or 2  chile peppers or 1 jalapeno peppers, chopped (don't rub your eyes!)


Directions:
Cook onions, garlic, beef, and sausage over medium heat until browned and tender.
Pour tomatoes, beer, coffee, broth, and hot sauce.
Add chili powder, wasabi powder, paprika, cayenne, cumin, sugar, oregano, coriander, and salt.
Stir in beans & peppers, bring to a boil.
Then reduce heat, cover and simmer.
Cook for 2 to 3 hours.

Serve with cornbread & biscuits!


What do you think? Comments? Suggestions? I would love to know that you visited my blog. Please leave me a message letting me know you were here! Did you try out a recipe? Let me know! I would love to hear from you :-)


Monday, August 29, 2011

No Bake Peanut Drop Cookies


I needed a lot of help getting ready for school this year. So I invited a lot of friends over to help me cut out some laminated things for my classroom. I bribed them with desserts. I needed something fast to make, but still tasty and unique. I found this great recipe after doing some searching on no-bake cookies. I love no-bake cookies but wanted to find another one besides the traditional no-bake oatmeal cookies. These turned out great - especially if you are a peanut butter lover. 


I have these awesome tool that is perfect for measuring peanut butter. You pull the tube out and set it to the amount you need. Fill with peanut butter then use it as a push tube to push out the peanut butter.


Ingredients:

2 packages of 16 oz. chocolate wafer melts
1 cup creamy peanut butter
2 cups unsalted peanuts
2 cups mini marshmallows
3 cups of crispy rice cereal
2 bags of 7 oz. peanut m&m's


Directions:
Melt chocolate wafers in a double boiler, microwave, or if you have a chocolate melter like me. (I use it for cake pops)
Quickly transfer to a large bowl.
Mix in peanut butter until completely stirred together.
Mix in peanuts, cereal, and marshmallows.
Scoop about 2 tablespoons of the mixture onto a cookie sheet lined with wax paper.
Top each one with a peanut M&M.
Place in fridge until they set. 


What do you think? Comments? Suggestions? I would love to know that you visited my blog. Please leave me a message letting me know you were here! Did you try out a recipe? Let me know! I would love to hear from you :-)

Friday, August 12, 2011

Pastelón (Sweet Plantain Puerto Rican Lasagna)

Our friend Mari introduced us to this several months ago and I was waiting for the perfect opportunity to try it out for myself. Pastelón, which is a Puerto Rican Lasagna, is just like lasagna but instead of lasagna pasta noodles you used slices of plantain. It has a mix of all these neat flavors, it's incredibly filling, and the sweet plantains are amazing. I'm sure there are many versions of this, but the one I used includes raisins and olives. I'm sure you can leave them out or just use a little. It's also not the healthiest thing I've ever made. But it is delicious, no doubt about it!


Ingredients:
1 lb. ground beef
3 cloves garlic, minced
1 onion, diced
1 green pepper, diced
1/2 cup chopped cilantro (or just use cilantro paste like I do)
2 tsp adobo (in the international/ethnic food aisle or spice aisle)
2 tsp italian seasoning
2 tbsp vinegar
1 envelope Sazón (in the international/ethnic food aisle)
2 tsp of bay leaves
8 green stuff olives, cut in half
1/2 cup raisins
4 or 5 plantains, peeled & cut into long strips (For really great directions on pictures on plantains, go here. I could try to explain it to you, but it won't be pretty.)
1/2 cup tomato sauce
3 eggs
2 tbsp milk
2 cups shredded mozzarella cheese
vegetable oil
salt
butter


Directions:
Preheat oven to 350 degrees. 
Mix ground beef, garlic, onion, green pepper, and cilantro in a large bowl. 
Then mix in adobo, italian seasoning, vinegar, & Sazon.
Heat a large skillet over medium-high heat and add 2 tbs of olive oil. 
Toss in the beef mixture and cook until brown.
Add bay leaves, olives, raisins, & tomato sauce. 
Lower heat and simmer for 10 minutes. 


Remove from heat.
Meanwhile, heat another large skillet with oil, on medium heat, just enough to cover the bottom. 


Fry the plantains, a while on each side, until they are golden brown & crispy.


Butter the sides & bottom of an 8 x 13 baking dish.
Layer the bottom most layer with plantains.


Spread a layer of ground beef on top of the layer of plantains. 


Top with a layer of mozzarella cheese and another layer of plantains. 


Continue the process, ending with plantains.


Mix eggs & milk in small bowl. Pour evenly over the last layer. Let it soak in and then sprinkle with a last little bit of cheese. 
Bake in oven for 20 to 30 minutes.
ENJOY!!!!


What do you think? Comments? Suggestions? I would love to know that you visited my blog. Please leave me a message letting me know you were here! Did you try out a recipe? Let me know! I would love to hear from you :-)


Thursday, August 11, 2011

Chicken Taquitos


I've always had a strong liking for taquitos from the freezer isle. I don't know what it is, but they are addicting. I found a neat recipe so that I could make my own taquitos. It's very simple and they are easy to make ahead and freeze. 


Ingredients:
3/4 pounds of cooked, shredded chicken (I boil it, then use two forks to shred it)
10 small tortillas
3 oz. fat free cream cheese, softened
1 cup reduced fat shredded cheese mexican blend
1/2 cup red onion, diced

1/4 cup salsa verde
1/4 cup cilantro paste (or fresh cilantro)
1 tsp onion powder
1 tsp garlic powder 
1/2 tsp cumin
1 tbsp chili seasoning
1 tbsp lime juice
Olive oil cooking spray.

Directions:
Preheat oven to 425 degrees.
In a medium bowl mix cream cheese, onions, salsa, cilantro, lime juice, & seasonings.
Add shredded chicken & shredded cheese.
Mix well.
Place about 2 spoonfuls of mixture on the side of tortilla.
Roll up tortilla tightly and place on greased cookie sheet.

Be careful to place it in such a way so that it can't unravel.
Continue with rest of tortillas and mixture.
Spray all over with olive oil cooking spray.
Bake in oven for 20 minutes. 

Watch carefully that they don't burn.

Serve with ranch dressing, guacamole, sour cream, or another yummy dip.


You can make these ahead of time and freeze them. After wrapping the chicken/cheese mixture inside of the tortillas place in gallon-sized freezer bag. When you are ready to eat them you don't have to defrost or thaw. Just place directly in preheated oven and cook for 20 to 30 minutes. Watch carefully. 

I paired the taquitos with this yummy taco salad with spicy ranch dressing. (see below).


What do you think? Comments? Suggestions? I would love to know that you visited my blog. Please leave me a message letting me know you were here! Did you try out a recipe? Let me know! I would love to hear from you :-)

Tuesday, August 2, 2011

Layered Mexican Shrimp Salad

This is an amazing salad. I take back my BEST SALAD EVER POST...this is really the best salad ever! 


I found this on Gina's Skinny Taste, of course. I love Gina's website. She is one of my favorite bloggers. I haven't met a recipe on her site that isn't amazing. I steal a lot of recipes from her. Yum Yum Yum. I also had to steal the recipe for the dressing as well. I made creamy tomatillo salad dressing to compliment this layered shrimp salad. I was so proud of myself because I've never made salad dressing from scratch before and it turned out to be addicting. 


Ingredients:
16 oz. cooked shrimp, tail shells removed
2 tbsp chipotle seasoning
2 tbsp lime juice
2 tbsp cilantro paste or fresh cilantro
15 oz can of black beans, drained & rinsed
15 oz can of whole kernel corn, drained & rinsed
1 head of lettuce, shredded
1 small red onion, diced
2 tomatoes, diced
2 avocados, diced
2 cucumbers, diced
1 cup reduced fat, shredded cheddar cheese 


Directions:
Thaw & rinse shrimp.
Mix shrimp in a small bowl with chipotle seasoning, lime juice, & some salt to taste.
In a separate bowl combine corn, beans, cilantro, & red onion.
Place lettuce in the bottom of large clear bowl or trifle dish.
Layer bean/corn mixture on top. 
Then top with cucumber, then tomato.
Top with avocado. (I ran out of avocados so I just spread out the fresh guacamole I had in the fridge)
Then top with the layer of cheese. 
Finish off with the shrimp on the top.

Serve with dressing! 

Monday, July 11, 2011

Santa Fe Pancakes (Inspired by Pancake Pantry)


We recently went on vacation with our friends to Hilton Head Island, South Carolina. We all took turns cooking each day. For breakfast my husband & I made Zucchini Quiche. But that was not the main attraction. My husband is obsessed with these Santa Fe Pancakes from The Pancake Pantry in Nashville. We got to visit our friends, Matty & Tricia in Nashville every year that they've lived there and each time we make sure to squeeze in a trip to The Pancake Pantry before we leave. (Did I mention I saw Taylor Swift the last time we went to Nashville???) The pancakes at the Pancake Pantry are actually called the Village Smithy COLO Santa Fe Pancakes because they are from the Village Smithy restaurant in Carbondale, Colorado. Well, thank goodness we were able to track down this recipe and create it for our friends for breakfast. My husband did most of the work and they turned out great. They are really delicious and quite unusual. 


Ingredients:
3/4 cup UNBLEACHED flour
3/4 cup yellow cornmeal
2 tbsp sugar
3/4 tsp baking powder
1 & 3/4 tsp baking soda
1/2 tsp salt
1 & 1/4 cups buttermilk 
2 large eggs
3 tbsp unsalted butter, melted & cooled
6 slices cooked bacon broken up into quarters
1 small can chopped roasted green chiles
4 green onions, diced
4 oz cheddar cheese slices, broken into smaller pieces


Directions:
Mix cornmeal, flour, sugar, baking powder, baking soda, & salt in a large bowl. 
In a separate bowl whisk buttermilk, eggs, & butter.
Add wet ingredients to dry ingredients and mix until smooth.
Spray a medium pan with cooking spray and heat over medium heat.
Pour about 1/4 cup of batter into pan. 
Right away top with the bacon, onions, cheese, & chiles (see picture above).
When the bottom is cooked (more than minute) then flip to the other side and cook for another minute. [This is an estimate, you may have to make the first few pancakes your practice ones.]
Repeat with remaining batter. 
Serve with honey, syrup, and hot sauce. YUMMO!


Those are some happy kids!

What do you think? Comments? Suggestions? I would love to know that you visited my blog. Please leave me a message letting me know you were here! Did you try out a recipe? Let me know! I would love to hear from you :-)


Tuesday, July 5, 2011

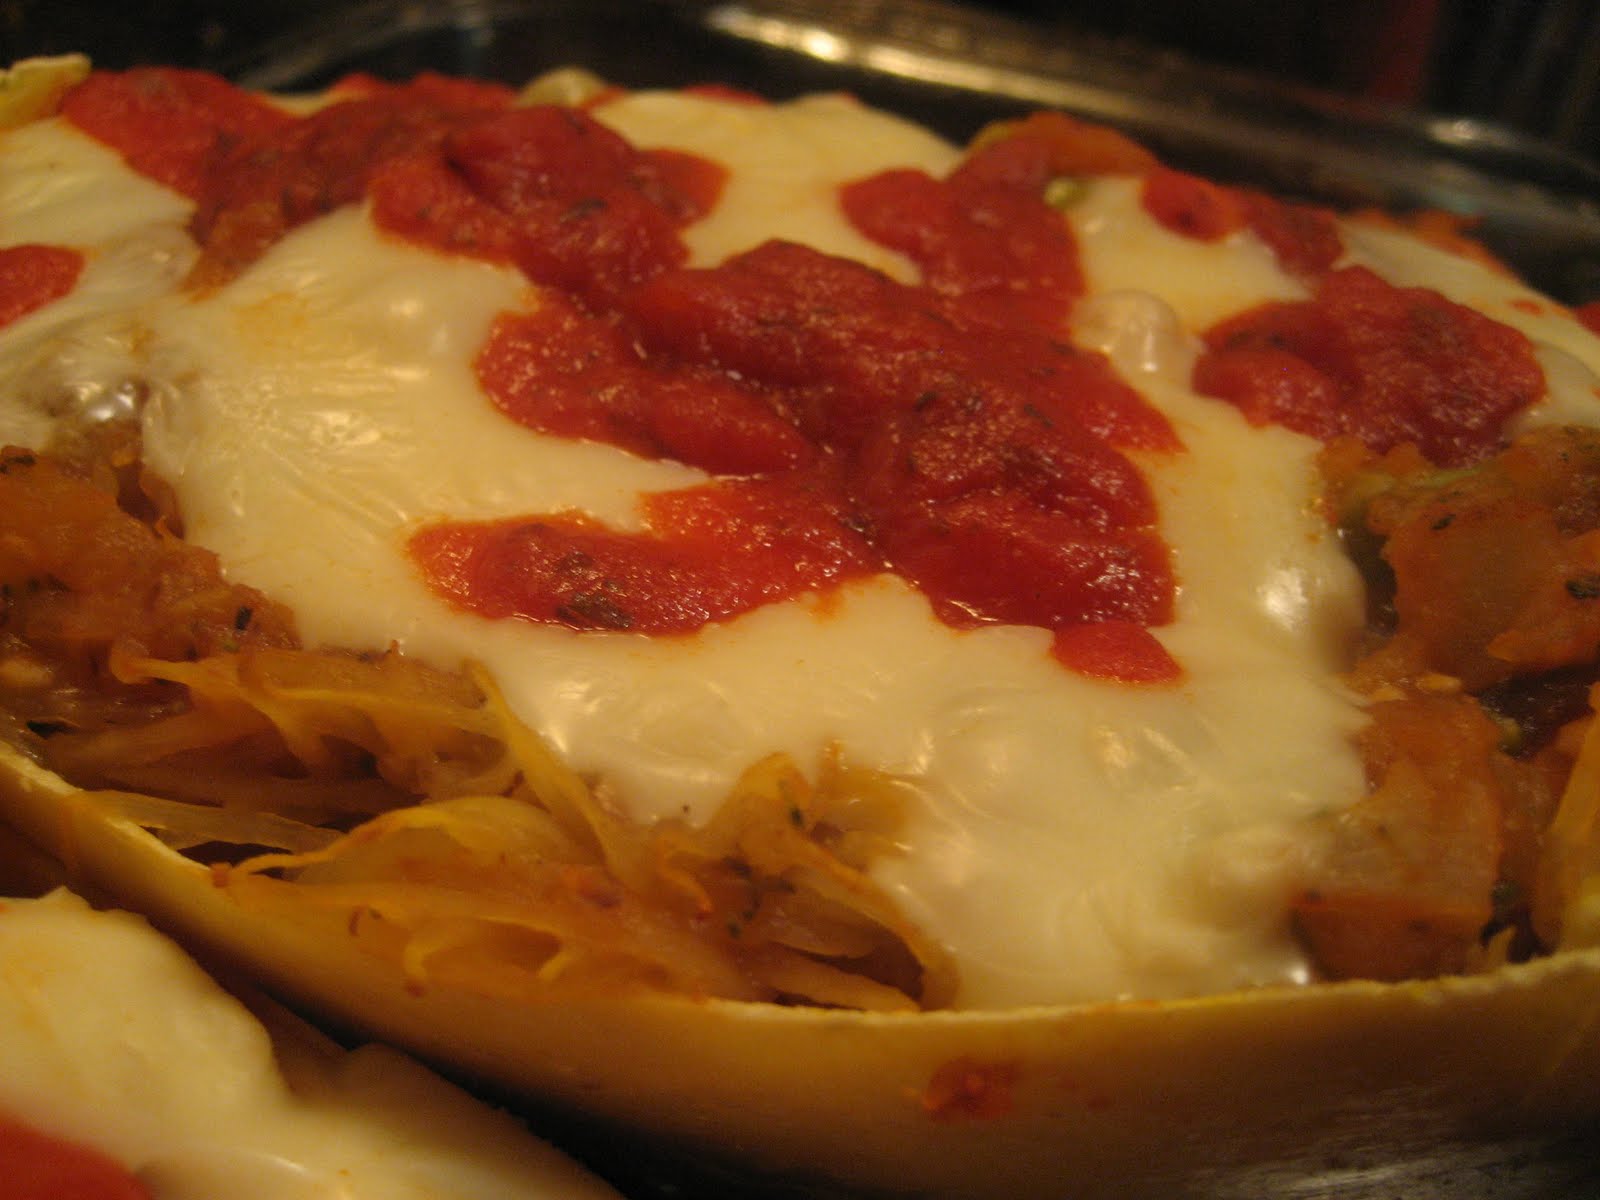
Spaghetti Squash Primavera

This may be one of the BEST recipes I've ever made! So proud! You have got to try this one out!

So months ago I was watching Diners, Drive Ins, & Dives for the first time. They went to this place called The Pit Stop in New York and they did the most amazing thing with a spaghetti squash. Well, this was right around my spaghetti squash kick, so I was pretty excited. I had to wait a little but the recipe was finally put up on the web. I tried it for the first time and even though it's a spaghetti squash stuffed full of veggies my husband still loved it. Spaghetti Squash Primavera is so good! Yummo!


Ingredients:
1 spaghetti squash
1 zucchini
1 yellow squash
1 red pepper
1 small eggplant
1 white onion
1 small head of broccoli
5 asparagus spears
1 oz of fresh parsley, chopped
1 jar marinara sauce
1 ball fresh mozzarella (I used lite part-skim)
2 tbsp extra virgin olive oil 
3 - 5 cloves of garlic, minced
salt & pepper to taste
parmesan cheese (optional)


The original recipe calls for other veggies; carrots, cauliflower, celery, & shallots. But I didn't include them. I figured this recipe has enough ingredients & vegetables already so I didn't bother.


I also think this recipe would taste great with red pepper. So if you are looking for a little kick, add that too!


I didn't use the parmesan cheese. But feel free to top your final product with that.


Directions:
Preheat oven to 350 degrees.


Split spaghetti squash in half and remove seeds. This is hard to do and involves a sharp knife. BE CAREFUL.


Add squash to large pot of boiling water and boil for 10 minutes. I had to do this in two phases and only bowl one half of the squash at a time.


While boiling, dice all vegetables. All the colors are so pretty!


In a very large pan heat olive oil and onions and garlic.
Saute until soft.


Then add all other vegetables and parsley. Stir together.


When read, move spaghetti squash from pot. Be careful, it's hot. I used tongs!


Using a fork, scrape the inside of the squash into a large bowl. I used the original pot that I boiled the spaghetti squash in after I drained it. 


Be sure to keep the shell and keep it in tact. 


Then add the vegetables in with the squash and most of the marinara sauce.


Mix together real well and split into the two spaghetti squash shells.


Top with thick slices of the mozzarella and remainder of the sauce.


Sprinkle with salt & pepper.


Cook in oven on baking sheet or pan for 10 to 12 minutes on 350 degrees.


Remove from oven, top with parmesan, and serve.


What do you think? Comments? Suggestions? I would love to know that you visited my blog. Please leave me a message letting me know you were here! Did you try out a recipe? Let me know! I would love to hear from you :-)


Related Posts Plugin for WordPress, Blogger...