Showing posts with label Sprinkles. Show all posts

Sunday, August 7, 2011

Chocolate Chip Cookie Cupcakes

I just love dessert! I found a great recipe for Cookie Dough Cupcakes. 


Ideally you would make cookie dough from scratch, the cupcake batter from scratch, and the frosting from scratch. But I pride myself on taking the easy way out if I think the results will be just as good. So I bought a tube of cookie dough and used a box of cake mix to make the cup cakes as well as a can of chocolate frosting. I thought the results were fantastic! You can judge me, but I'm ok with it.


Check out this awesome old-school mixer we have at the beach house. Works just as good as my one at home!


Ingredients:
1 tube of cookie dough (you probably won't use the whole package)
1 box yellow cake mix
1 1/3 cups water
1/3 cup canola oil
3 eggs
1 can of chocolate frosting


Directions:
Roll the cookie dough into 1 inch balls and place in freezer for 2 hours. 
Preheat oven to 350 degrees.
Using a mixer, beat eggs.
Add cake mix, water, & oil and mix on medium speed for a couple minutes until smooth.
Place cupcake liners in a cupcake tin and fill most of the way (but not all of the way) with the cupcake batter.
Place cookie dough ball in center of each cupcake. 
Don't worry about the ball being completely covered, it will be covered when it bakes. 
Bake in oven for about 20 minutes. Check with toothpick to make sure that the cupcake is cooked through, don't worry about the cookie part.
Remove and let cool for 10 minutes before covering with frosting.
Serve with sprinkles if you so desire!


I had some leftover batter and cookie dough so I poured the rest of the batter in a square cake pan and placed 9 cookie dough balls in the middle then baked it the same way, but a little bit longer because it was cake. It was equally awesome.


What do you think? Comments? Suggestions? I would love to know that you visited my blog. Please leave me a message letting me know you were here! Did you try out a recipe? Let me know! I would love to hear from you :-)

Saturday, August 6, 2011

More Peanut Butter Oatmeal

I had posted months ago about Peanut Butter Baked Oatmeal. I made some again, last week at the beach for my family. 

I wanted to make it fun so I put mini chocolate chips on 1/3 of it and rainbow sprinkles on another 1/3 of it. It was mostly just for the enjoyment of my niece Maddie. And it worked because she thought it was dessert for breakfast. She loves sprinkles (and cake pops!) See the picture below, she is attempting to give me a thumbs up. 

Wanted to show off this breakfast/dessert & all it's glory. We had a great time at the beach and I enjoyed my day to cook. 


MMMMMMMmmmmmmm! This was an amazing breakfast.  Oatmeal & Sunflower Seed Pancakes with honey & bananas, Bacon, Onion, & Hashbrown Medley, & Ramen Noodle Quiche. 


And you can't forget mimosas....Perfect start to the day!


What do you think? Comments? Suggestions? I would love to know that you visited my blog. Please leave me a message letting me know you were here! Did you try out a recipe? Let me know! I would love to hear from you :-)


Friday, July 1, 2011

Baby Shower Cake Pops

I recently helped plan out two baby showers this year and made some cake pops for each one. I made owl cake pops, baby boy cake pops, and pink & silver sprinkled cake pops. 

Here is a sneak peek of how they turned out. Stay tuned for multiple posts on the big events!


What do you think? Comments? Suggestions? I would love to know that you visited my blog. Please leave me a message letting me know you were here! Did you try out a recipe? Let me know! I would love to hear from you :-)


Monday, April 11, 2011

Cooking With Maddie

My niece, Madelyn Paige is 2 and she's A LOT of fun. For starters, she adores cake pops. So much so, that when she was over and I was making them, she pushed a kitchen chair over to the counter, climbed on up and insisted she needed to help. All the while yelling, "Cake Pops! Cake Pops! Cake Pops!" in her adorable 2-year old voice. LOVE HER!!!


She also helped me make the s'more cookies that are in the previous post. They didn't come out so perfect, but my company did not seem to mind. The best part of cooking with Maddie is that she doesn't care how beautiful the desserts come out, she'll eat it anyway! Looks like the s'more cookies were Maddie-approved!


It was a lot of fun cooking with her. She even helped me dip the cake pops in chocolate and just like her Aunt, she is a sucker for sprinkles! Yeah Maddie Girl!

What do you think? Comments? Suggestions? I would love to know that you visited my blog. Please leave me a message letting me know you were here! Did you try out a recipe? Let me know! I would love to hear from you :-)


Wednesday, February 16, 2011

Cupcake Bites

These are so so so amazing. I think it's because I used the dark chocolate mint melts instead of regular. If you like mint & dark chocolate AND like cake pops then this is the perfect mesh.

You need to make normal cake pop balls like you would for any other recipe. Make them, prepare them, and freeze them first. After they have been shaped and in the freezer for 15 minutes you are ready to move on. You won't need sticks for this.


The trick is to use the candy molds in the shape of peanut butter cups for the base of your cup cake bites. Melt chocolate wafers (I highly recommend the dark chocolate mint if you like the combination of those flavors, look for them at AC Moore or Michael's) according to package directions. You have the option of using the squeeze bottles, any kind will do. But I didn't really like using them. You might have better luck. Just make sure they are FULLY melted. I used a normal glass cup to melt mine in.


Then you spoon/squeeze the melted chocolate into the molds. Don't fill them all the way. Only fill 3/4 of the way. Only do a couple at a time. Because before they dry you must place the cake balls in each mold with the chocolate in it. Once the tray is full place them in the freezer. You may want to use multiple trays at a time to make this go faster.


Wait for them to cool an dry. Pop them out individually. Melt a different color chocolate such as pink or another cut cupcake color. Dip the top of the cupcake, the cake ball, into the melted chocolate holding the cupcake by the chocolate base. Place a red M&M upside down on the top and cover with rainbow sprinkles before the chocolate melts. 


ADORABLE!!!


What do you think? Comments? Suggestions? I would love to know that you visited my blog. Please leave me a message letting me know you were here! Did you try out a recipe? Let me know! I would love to hear from you :-)


Saturday, February 12, 2011

Cake Pops (Spiced w/ Peanut Butter & Chocolate Sprinkles)

On my most recent Snow Day we had another Cake Pop Extravaganza. 3 of my fellow teacher friends came over and we went into a cake pop frenzy. We made a bunch of different kinds. One of the coolest combinations that we came up with (Thanks Nicole!) were...


Spice Cake + Peanut Butter Flavored Chocolate Melts + Chocolate Sprinkles 

Have you ever had Duncan Hines Moist Deluxe Spice Cake before? So Good! The spice comes from such things as cinnamon, allspice, coriander, ginger, & nutmeg. Just as good as chocolate cake...give it a try.

There are all different kinds of Candy Melts to try out. Traditional chocolate is always good. There are different types of colors...purple, pink, blue, red, etc. that are vanilla flavored. But my favorite are dark chocolate, dark chocolate mint (!!!!), and peanut butter. 

The peanut butter was hard to work with after a while. It started to dry out and we weren't able to reheat it properly. But it worked out in the beginning. It also tasted really good. 

The chocolate sprinkles were definitely the best, but we had other types of fun sprinkles that we used and other colors/flavors that we tried out. 

If you don't know how to make cake pops yet you can check out my original cake pop post or buy this cake pop book. 

What do you think? Comments? Suggestions? I would love to know that you visited my blog. Please leave me a message letting me know you were here! Did you try out a recipe? Let me know! I would love to hear from you :-)


Wednesday, February 9, 2011

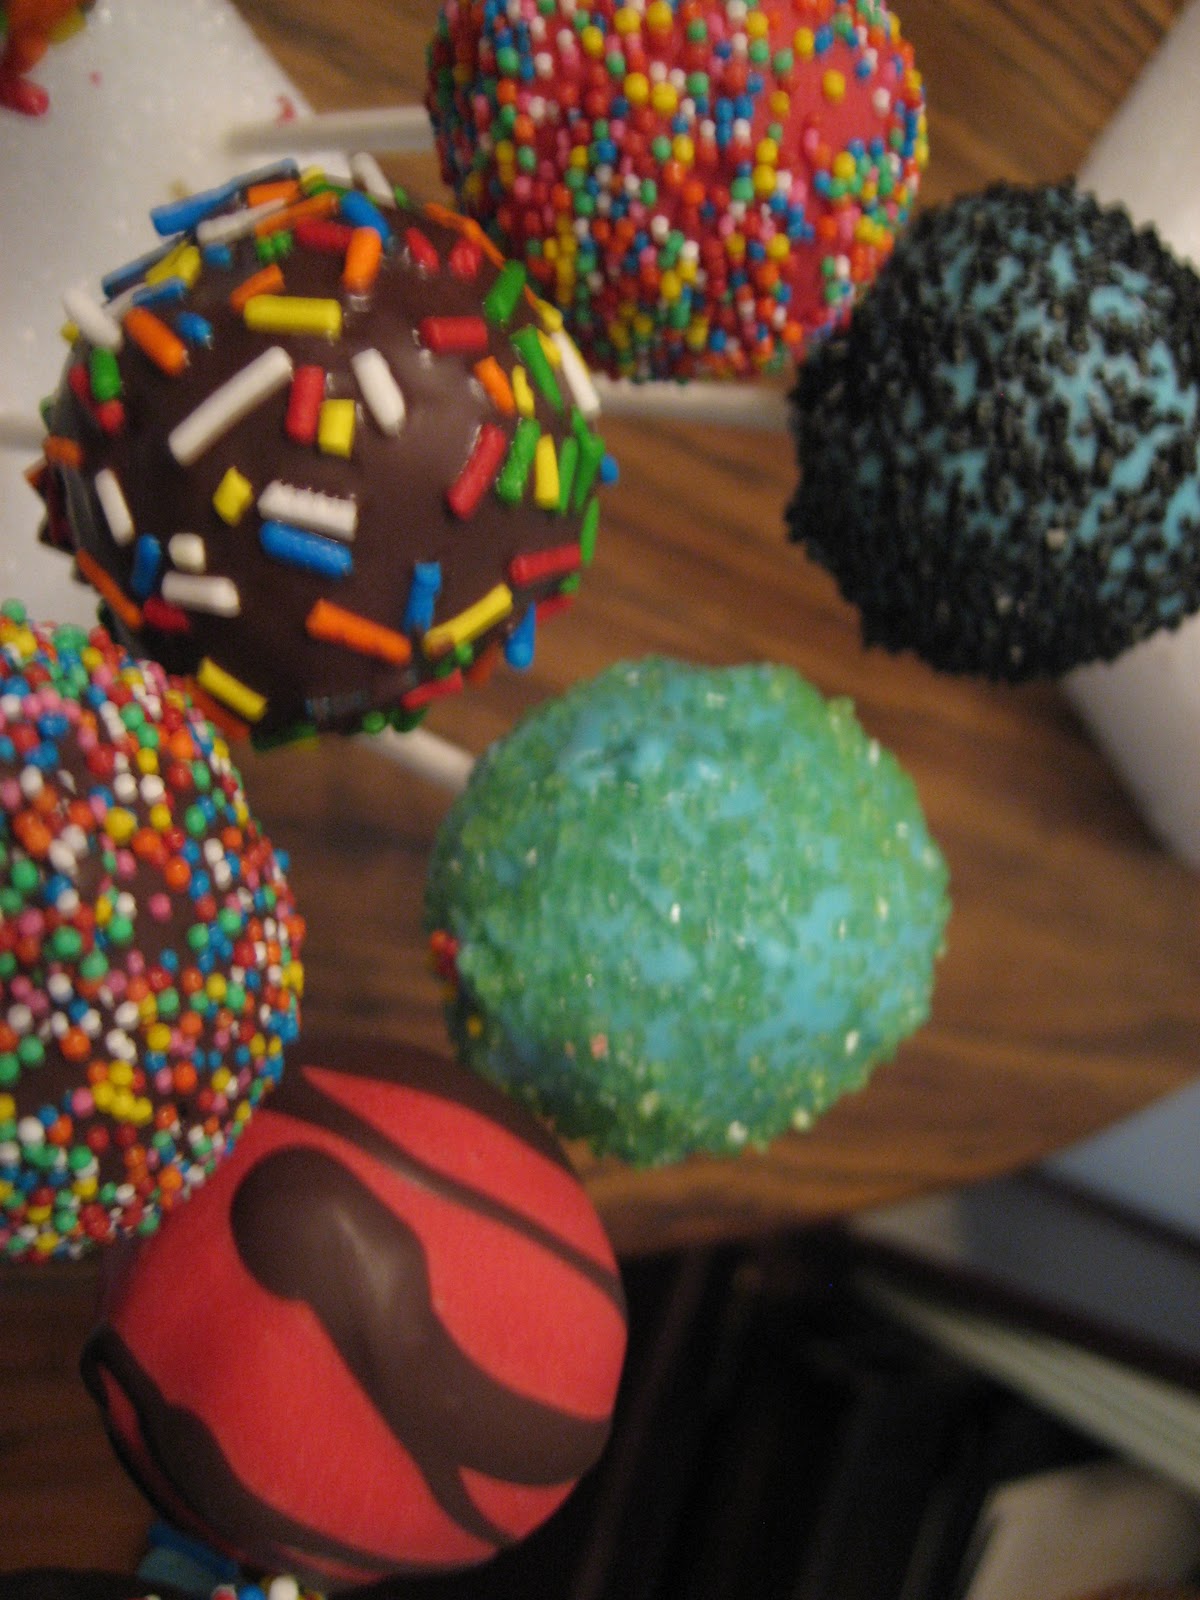
Cake Pops (Sprinkles!!!)


 So if you've talked to me at all in the past month you've learned of my newest delight...CAKE POPS!!!


They are a great "rainy day" activity or if you are a teacher like me...a SNOW DAY activity. We've had a handful of snow days this winter so I've stayed inside and made cake pops. If you've never heard of cake pops, just google them and you'll see all sorts of cool stuff. I had heard about them through Bakerella whose blog I occasionally read. Now, there are some websites and other resources out there about what cake pops are or how to make them, but Bakerella has some REALLY cute stuff. She recently released a book on cake pops and that's where I 
learned how to make them. I actually checked out the book from the library to save some money. You might want to scope out the book to learn the techniques and get some creative ideas. They have cake pops for EVERY occassion. I've made some cute ones, but they can be A LOT of work. Like 4 or 5 hours worth of work. So don't try these unless you can dedicate an entire afternoon or have a lot of help.


These are going to be EVERYWHERE in the next year or so. I know you are going to see them a lot at weddings, showers, parties, birthdays, etc. So keep your eyes out -- you heard it here first! The best part about cake pops is yes, they are so stinkin' cute but they taste REALLY REALLY good. They usually last for several days. So make them a few days in advance if you are trying to save time. 

If it's your first attempt at cake pops I would suggest keeping it simple and just trying for basic cake pops, cake balls, or basic cake pops with sprinkles. They are super delicious and as the leading expert on sprinkle useage I can honestly say that sprinkles are an awesome, colorful touch. Go for it!


You should read up more on cake pops before trying to make them, but I can give you a basic idea on how to make them below...


Bake a cake according to box directions. You could bake it from scratch of course, but this is already a process, so just keep it simple. Pillsbury, Duncan Hines, etc. will do the trick. I've used regular chocolate cake, funfetti, spice cake, and vanilla (buttercream recipe) they are all equally awesome. It's fun to experiment with different kind and flavors, but for now just stick with something you love. So I would recommend trying out chocolate cake first. 


After baking the cake, let it cool, then break the cake up and crumble it into a medium size bowl. Mix in a half can of chocolate icing (or other kind) with a spoon so that the whole batch is moist. Using your hands roll the cake into 1 inch sized balls. Place on cookie sheet or pastry board and place in the freezer for about 15 minutes so they harden. One cake makes about 48 cake balls. 


Once the balls have cooled, dip a lollipop stick into melted chocolate (use those wafers from AC MOORE/Michael's) then insert halfway into the cake ball and let it dry. Then dunk the cake pop completely into the chocolate. The trick is to use a narrow deep glass/bowl/dish. Small glass measuring cups are really useful. You are going to dip the stick with the cake ball straight into the chocolate and completely submerge it. Don't twirl or move around that will cause the cake to come off. It may take a couple tries. 


You will have to tap off some of the extra chocolate. Do this careful and wait a little, especially if the chocolate is really really hot. But before the chocolate dries cover in sprinkles or spoon sprinkles over top. Place in a styrofoam stand to dry.


It's a pretty complex process, especially if you do any of the cute ones, so I highly suggest reading up on it. But they are totally worth it and always a hit. ENJOY!


What do you think? Comments? Suggestions? I would love to know that you visited my blog. Please leave me a message letting me know you were here! Did you try out a recipe? Let me know! I would love to hear from you :-)


Thursday, February 3, 2011

Chocolate Berry Baked Oatmeal


I was sick last week and thought I know I should have nursed myself back to health with some chicken soup I wanted some baked oatmeal instead. I was craving sometime of comfort food and I'm guessing the simplicity of baked oatmeal just brought me a lot of comfort. Not sure why. I know there are also healthier ways to make baked oatmeal, but that was not where my mind was at. It was mid-afternoon when I made it and hadn't eaten all day so I wanted more of a sweet snack then a breakfast treat. I wound up making more of a dessert and less of a traditional baked oatmeal. But it was perfect because I could still eat it for breakfast the next day. Obviously, the sprinkles are an optional touch, but you'll see they are totally worth it if you are anything like me. :-)


Ingredients:
2 cups of mixed berries (frozen)
3 cups of old-fashioned oats
2 eggs
1/2 cup of heavy cream
1/4 cup of brown sugar
4 tsp oil
3 tsp baking powder
1 tsp ground cinnamon
2 tsp cocoa powder (secret ingredient!)
1 tsp pumpkin pie spice
1 tsp salt
approximately 20 walnuts, halved
half a bag of chocolate chips (or as much as you want)
sprinkles!


Directions:
In a bowl combine eggs and oil.
Mix in oats, baking powder, sugar, salt, spice, cocoa powder, and cinnamon.
Stir in chocolate chips and walnuts.
Add frozen fruit.
Transfer to a sprayed 9 in. circular pie dish.
Pour heavy cream over top.
Bake in preheated oven at 350 degrees for 30 minutes.
Remove from oven and top with sprinkles. 


Mmmmmmmm....Comfort :-)


What do you think? Comments? Suggestions? I would love to know that you visited my blog. Please leave me a message letting me know you were here! Did you try out a recipe? Let me know! I would love to hear from you :-)


Wednesday, December 1, 2010

The Perfect Day

The Taco Bake of Golden-Brown Awesomeness for dinner

+

 Sour cream, cornbread, homemade guacamole & homemade salsa

+

 My adorable niece Halle Grace

+

My wonderful husband Gerald Stoltzfoos!!!!!

+

Crepes made by Aunt Naomi! 
(Note the sprinkles, she knows me so well -- nice touch!)


= The Perfect Day!


I would love to know that you visited my blog or tried out a recipe. Leave me some love & encouragement!

Sunday, October 31, 2010

Czech Crepes With Fruit & Cream


I made these for cooking club over the summer. They are very easy to make and worth it, because they are crowd pleasers. Plus they are fairly light & healthy. So everybody wins. I only took one picture with my cell phone and it doesn't really do it justice. If you want a really good picture check out Gina's Skinny Recipes because this is where I got the recipe from and she always has beautiful pictures. 

Ingredients:
  • 1 cup whole wheat flour
  • 1.5 cups skim milk
  • 2 egg whites
  • 1 egg
  • 1 tsp oil
  • fat free butter flavor spray
  • powdered sugar
  • 1 small carton of fresh raspberries
  • 1 small carton of fresh blueberries
  • 1 small carton of fresh strawberries, cut in quarters
  • Fat Free Cool Whip

Directions:
  1. In a medium bowl, combine berries.
  2. Meanwhile, in a medium bowl, whisk flour, milk, eggs and oil until smooth using a wire whisk or you can put in the blender. 
  3. Heat a large nonstick pan on medium-low flame.When hot, spray with buttered flavored spray to coat bottom of skillet. 
  4. Pour about 1/4 cup crepe mixture into pan, swirling pan slightly to make crepe thin and smooth.Cook for 1 to 2 minutes or until bottom of crepe is light golden brown. Flip; cook 30 seconds to 1 minute or until light golden brown. Repeat with remaining buttered flavored spray and crepe mixture.
  5. Spoon whipped cream into center of each crepe. Top with berry mixture and fold each edge of crepe over filling. Sprinkle lightly with powdered sugar. 


I would love to know that you visited my blog or tried out a recipe. Leave me some love & encouragement!

Tuesday, October 19, 2010

Pumpkin Pie!

I was on the hunt Saturday morning in the grocery store for pie crusts for my Pepperoni N' Cheese Quiche. Took me a while to realize the kind I wanted were in the freezer section. But while I was spending A LOT of time in the baking isle I stumbled across the pre-made pie crusts made from graham crackers & oreos. I got reminescent of the baking I did in college. (I made some killer cheesecake back in the day). While I was off in dream-land a worker from Darrenkamps wheeled out a bunch of Libby's Pumpkin Puree to put on the shelves and the gentleman next to me who was looking as hard for an item as I was got so excited when the Libby's cans appeared. (Apparently it was the item he was scavenging for) So his excitement coupled with my nostalgia gave me the urge to make pumpkin pie. Never made it before, but I was missing my baking days. I grabbed a can and some graham cracker crusts. Total impulse buy, but worth it.


I totally messed up while cooking them though. The directions said to cook for 15 minutes @ 425, then 40 to 50 @ 350. But I misread it and cooked them @ 425 for 45 minutes. They looked a little brown. BUT the good news is I tested it out the other night @ small group and it was a hit.


Just so you know...it wouldn't be a Jilly dish without the sprinkles...


Also, I just need to share this. My husband tried it the following day, and out of the blue he said, and I quote "That pumpkin pie you made, that was the best pumpkin pie I've EVER tasted." Ok, so I know I didn't make it from scratch or anything. But this is my very first pumpkin pie. Not to mention my husband is a baked goods EXPERT. So, needless to say, I appreciate the compliment. He also kept raving about the sprinkles...gotta love this man!


Ingredients:

  • 2 pre-made graham cracker pie crusts
  • 1 can of Libby's Pumpkin Puree
  • 2 teaspoons ground cinnamon
  • 1.5 cups granulated sugar
  • 1/2 teaspoon salt
  • 4 eggs
  • 2 cans of evaporated milk
  • 1 container frozen whipped topping, fat free
  • lots of sprinkles!
Directions:
  1. Mix sugar, cinnamon, & salt in a bowl.
  2. In another bowl beat eggs. Stir in pumpkin & sugar mixture.
  3. Gradually stir in evaporated milk.
  4. Pour into pie shells.
  5. Bake in pre-heated oven for 15 minutes at 425 degrees.
  6. Reduce temperature to 350 degrees and bake for another 40 to 50 minutes.
  7. Let cool, top with whipped topping & lots of sprinkles!
I would love to know that you visited my blog or tried out a recipe. Leave me some love & encouragement!

Monday, October 18, 2010

Magic Cookie Bars

Continuing my sentimental-kick I decided to whip up some Magic Bars like I did back in college. It's from one of my mom's classic mini-cookbooks. It calls for two cans of condensed milk which I've pretty much NEVER used before except for when I make these magic cookie bars. So I've had these cans in my cupboard lying around for a very long time and I was scared to use them. But the internet is a beautiful thing. I did some research and unopened cans of evaporated milk pretty much last forever. PHEW. But I had to run out and get more anyway for the butterfinger dessert I made. I love to make these because they are easy to make, but still very good. However, I know a handful of people that don't like coconut so it's not always the best choice. Because the coconut flakes MAKE the dish. I refuse to make it without the coconut. I took them to a cook-out this weekend and even though some of the guests didn't like coconut they still enjoyed the treat. Yum!

(Side Note: Any basic recipe for cookie bars you can find on the side of a can for sweetened condensed milk.)

Ingredients:

  • 1/2 cup of graham cracker crumbs
  • 1/2 cup of butter, melted
  • 1 bag of 12 oz semi-sweet tiny chocolate chip morsels
  • 2 cans of sweetened condensed fat free milk
  • 1 cup coconut flakes
  • sprinkles (optional)


Directions:

  • Preheat oven to 350 degrees.
  • Mix graham cracker crumbs with butter and press into bottom of 2 8 by 8 inch square baking pans/dishes.
  • Top each pan with 1 can of condensed milk,  spread evenly.
  • Top with coconut flakes, chocolate chips, and sprinkles (!!!!)
  • Bake in oven for 40 minutes. (Note: You may have to cook longer for the fat free milk).


I would love to know that you visited my blog or tried out a recipe. Leave me some love & encouragement!
Related Posts Plugin for WordPress, Blogger...