Wednesday, July 6, 2011

Fruit Kabobs

For my sister-in-law's belated baby shower we made fruit kabobs. They were a big hit! Very easy to do and you can style them any way you want. After slicing up the pineapple we used the top as decoration. The possibilities and combinations are endless. ENJOY! 


I helped another baby shower recently, and I took no part in the assembly of these, but we also made fruit kabobs. Here are some more ideas. Instead of doing grapes & blueberries, these have watermelon. Then we used the rest of the watermelon to display the kabobs. So cute!


I also saw the coolest Rainbow Fruit Kabobs on GreenLiteBites. There is a video up on how to make them and really cool pictures. 


What do you think? Comments? Suggestions? I would love to know that you visited my blog. Please leave me a message letting me know you were here! Did you try out a recipe? Let me know! I would love to hear from you :-)


Tuesday, July 5, 2011

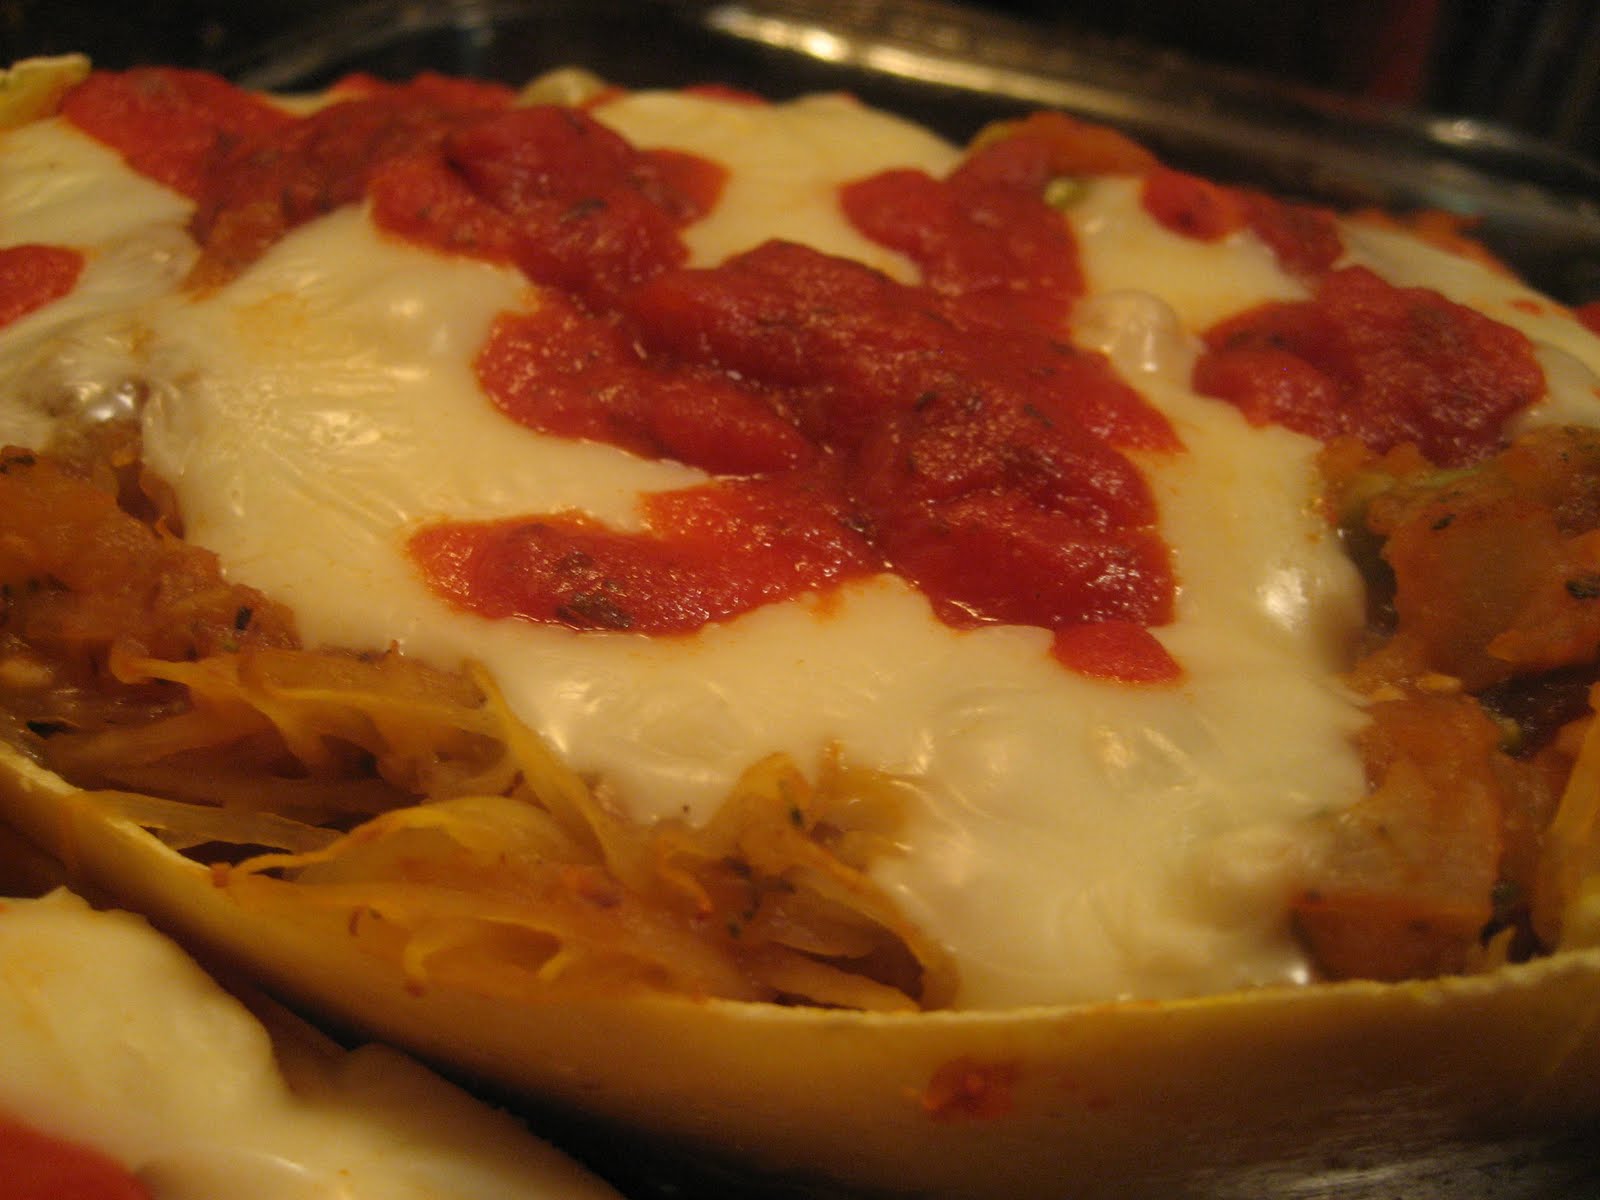
Spaghetti Squash Primavera

This may be one of the BEST recipes I've ever made! So proud! You have got to try this one out!

So months ago I was watching Diners, Drive Ins, & Dives for the first time. They went to this place called The Pit Stop in New York and they did the most amazing thing with a spaghetti squash. Well, this was right around my spaghetti squash kick, so I was pretty excited. I had to wait a little but the recipe was finally put up on the web. I tried it for the first time and even though it's a spaghetti squash stuffed full of veggies my husband still loved it. Spaghetti Squash Primavera is so good! Yummo!


Ingredients:
1 spaghetti squash
1 zucchini
1 yellow squash
1 red pepper
1 small eggplant
1 white onion
1 small head of broccoli
5 asparagus spears
1 oz of fresh parsley, chopped
1 jar marinara sauce
1 ball fresh mozzarella (I used lite part-skim)
2 tbsp extra virgin olive oil 
3 - 5 cloves of garlic, minced
salt & pepper to taste
parmesan cheese (optional)


The original recipe calls for other veggies; carrots, cauliflower, celery, & shallots. But I didn't include them. I figured this recipe has enough ingredients & vegetables already so I didn't bother.


I also think this recipe would taste great with red pepper. So if you are looking for a little kick, add that too!


I didn't use the parmesan cheese. But feel free to top your final product with that.


Directions:
Preheat oven to 350 degrees.


Split spaghetti squash in half and remove seeds. This is hard to do and involves a sharp knife. BE CAREFUL.


Add squash to large pot of boiling water and boil for 10 minutes. I had to do this in two phases and only bowl one half of the squash at a time.


While boiling, dice all vegetables. All the colors are so pretty!


In a very large pan heat olive oil and onions and garlic.
Saute until soft.


Then add all other vegetables and parsley. Stir together.


When read, move spaghetti squash from pot. Be careful, it's hot. I used tongs!


Using a fork, scrape the inside of the squash into a large bowl. I used the original pot that I boiled the spaghetti squash in after I drained it. 


Be sure to keep the shell and keep it in tact. 


Then add the vegetables in with the squash and most of the marinara sauce.


Mix together real well and split into the two spaghetti squash shells.


Top with thick slices of the mozzarella and remainder of the sauce.


Sprinkle with salt & pepper.


Cook in oven on baking sheet or pan for 10 to 12 minutes on 350 degrees.


Remove from oven, top with parmesan, and serve.


What do you think? Comments? Suggestions? I would love to know that you visited my blog. Please leave me a message letting me know you were here! Did you try out a recipe? Let me know! I would love to hear from you :-)


Monday, July 4, 2011

Baby Shower Fun


Two and a half years ago I became an Aunt for the first time. My niece Maddie is a lot o fun and so stinking adorable. Fast forward to this past September where I became an Aunt again, but I went to having one niece to having FIVE. Yes, Five! My niece Halle was born September 2nd and my triplet nieces were born on September 11th; Annabelle, Clare, & Grace. The triplets came 3 months early so we ran out of time to throw my sister-in-law a baby shower. So we threw a belated drop-in meet-and-greet baby shower party this past April when the girls were 7 months old. It was a blast! 


On the menu was meatballs, spinach dip, and crab dip. We had bread & cucumber slices to use for the dips and the cutest part was the fruit kabobs.


Special thanks to my sister-in-law's sister, Julie, for opening up her home and doing a great job with decor. I loved what she did with the chalkboards!


I got this for my mother-in-law for her birthday this year since I know she's always hosting meals for large groups of people. 


Pink Lemonade, so appropriate!


And of course, CAKE POPS!!! (As the favor.) Pink & Silver to go with the baby shower theme. Complete with a note from the girls! :-)


I was also blessed to throw another bay shower this year for my friend Jessie, this past June. It was soooooooo cute! Stay tuned for a future post on that coming soon!

What do you think? Comments? Suggestions? I would love to know that you visited my blog. Please leave me a message letting me know you were here! Did you try out a recipe? Let me know! I would love to hear from you :-)


Sunday, July 3, 2011

Low Fat Fajitas


Ingredients:
lean ground turkey
green bell pepper, cut into strips
red bell pepper, cut into strips
white onion, cut into strips
1 medium tomato, diced
shredded lettuce
1/4 cup reduced fat shredded cheese
1 avocado, pitted and cubed
low fat/fat free ranch dressing for dipping
low fat tortillas


Directions:
Cook ground turkey in medium skillet.
Add peppers & onions and cook until tender.
Add all ingredients to tortillas and serve. 


What do you think? Comments? Suggestions? I would love to know that you visited my blog. Please leave me a message letting me know you were here! Did you try out a recipe? Let me know! I would love to hear from you :-)


Easy Dinner - Shrimp & Veggies

Gorton's Shrimp + Green Giant Veggies + Quinoa = 
AWESOMENESS!

I'm enjoying cooking delicious meals from scratch. But sometimes it's nice to take the night off. Here is a perfect meal for two that can be made in about 10 minutes. It's nice to buy the items ahead of time (when they are on sale) and save this for a rainy day (or a busy week!)

Take one bag of Gorton's Grilled Shrimp (& cook according to package directions, I recommend cooking them in the oven, takes about 10 - 12 minutes).


Take one package of Green Giant vegetables (any kind will do, I just really like this specific kind! MMMMmmm Edamame.) and steam in the Microwave according to box directions. It will take about 5 to 6 minutes to do plus additional minutes to cool. So you can cook these shortly after the shrimp go in the oven.


Cook about one cup of Quinoa. This is the only brand that they sell at Darrenkamp's but I know there are other kinds and I've never tried the red quinoa before. If you don't like Quinoa (or know what the heck it is -- pronounced KIN-WA) you can use rice, or couscous, or a type of pasta instead. The Quinoa will take away 10 minutes to cook. So you can start boiling the water first. Cook according to package directions. It's nice to have some pre-made Quinoa in the fridge. If you are able to heat that up and serve with shrimp & veggies then the meal will be easy-peasy!


What do you think? Comments? Suggestions? I would love to know that you visited my blog. Please leave me a message letting me know you were here! Did you try out a recipe? Let me know! I would love to hear from you :-)

Saturday, July 2, 2011

Diet Soda Cake :-)


One time I was trying to make cake pops and I ran out of eggs. But with a little help from google I learned how to solve the problem of making no-eggs cake. The secret is a can of soda! For real! 


If you are using a regular cake box mix you use the same amount of oil and mix. But do NOT add the water specified by the box. Instead replace with one can of soda for the eggs. 


You will have to cook the cake for an additional 5 to 10 minutes past what the box directions say. It will come out more moist than a regular cake and will be perfect for cake pops (even though it will make creating the cake pops extra messy). 


Use a light colored-soda for a light cake and a dark soda, like coke, for chocolate cake. This also helps eliminate calories if you use diet soda instead of eggs.


Those who know me well know I have a strong addiction to Diet Coke. So if there is a way to incorporate it into any of my recipes I'm all for it. ENJOY!


What do you think? Comments? Suggestions? I would love to know that you visited my blog. Please leave me a message letting me know you were here! Did you try out a recipe? Let me know! I would love to hear from you :-)

Friday, July 1, 2011

Mint Oreo Cake Pops

I was at a friend's bridal shower a few weeks ago. I had made special bride & groom cake pops for the occasion but there were other awesome foods & desserts at the party too. There were these delicious pastel-colored oreo cake balls. As each guest took a bite into them they realized they weren't just oreo, they were mint-flavored too! MINT!! LOOOOOVE Mint! We were trying to figure out the secret. Was it mint extract? Was the melted chocolate that the oreo was dipped into mint-flavored? Well it dawned on me when I was at the grocery store recently. The cake balls (which don't actually have cake in them) are made from Mint Oreos! Amazing!!!! These are just as fun to work with as the regular cake balls. But a little less time consuming because you don't have to bake an actual cake. They work well if you need to freeze them too.


Ingredients:
1 18 oz. package of mint oreos
1 8 oz. package of cream cheese, softened
All additional supplies for making cake pops: melted chocolate, sticks, etc.


Directions:
Place oreos (several at a time) in a small food processor. [It's crazy how the green oreo creme filling just disappears!]
Once all the oreos are broken down mix in broken up pieces of soft cream cheese.
Mix with fork and spatula.
Use hands to form oreo balls. Approximately 30.
Freeze then proceed with regular cake pop directions.


What do you think? Comments? Suggestions? I would love to know that you visited my blog. Please leave me a message letting me know you were here! Did you try out a recipe? Let me know! I would love to hear from you :-)

Mexican Pot Pie


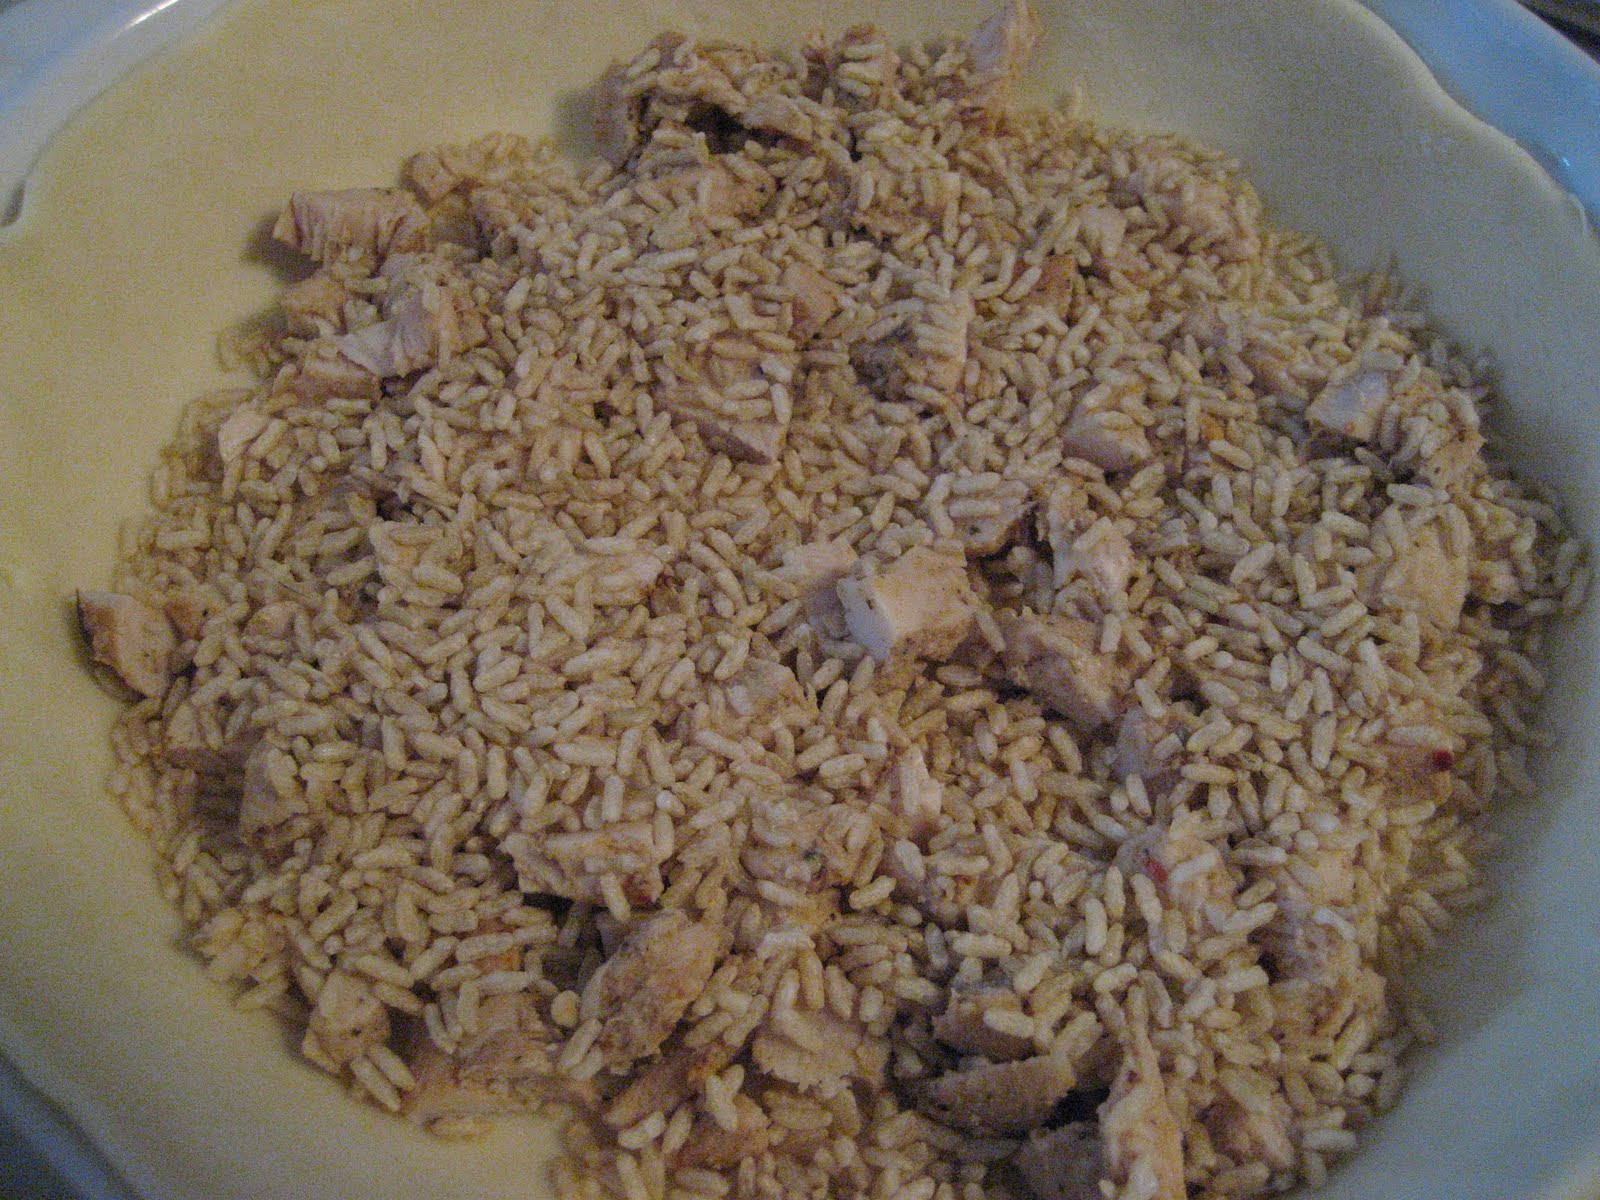
We had friends over putting in our new patio this past spring. (Thanks, guys!) They did an awesome job and we promised them a full meal for their help. So while they were working outside I was working in the kitchen to make this Mexican Pot Pie. It is from the Best of Pillsbury Bake-Off book. Yum! I wound up doubling the recipe and making two whole pies. (I had a lot of hungry men at my house). 


Instead of buying raw chicken and cooking it, I decided to take a short cut (no pun intended) and use the Purdue chicken breast Short Cuts - Southwestern Style. It seemed just too perfect (they were on sale) for me to pass up. 


Ingredients:
1 container of pie crusts (2 crusts per box)
1 package refrigerated southwestern-seasoned chicken breast strips, thawed
1/2 cup uncooked instant rice
1 15 oz. can of black beans, drained & rinsed
1 can kernel corn with red & green peppers, drained
1 can of whole black olives, drained & sliced
1 tsp garlic powder
1 tsp ground cumin
1/2 tsp salt
1/2 tsp black pepper
1 cup fat free sour cream
1 cup chunky-style medium salsa
2 cups shredded cheese, mexican-style
1 egg, beaten


Directions:
Preheat oven to 400 degrees.
Prepare pie crust as directed in pie plate.
In a large bowl mix chicken, rice (uncooked), beans, corn, olives, garlic, cumin, salt, pepper, sour cream, & salsa.
Pour into each crust-lined pie plate.
Top with second crust. 
Seal edges and attempt to make the edges fancy. (I didn't bother).
Cut slits in several places.
Brush top with beaten egg and top with parsley.
Bake in oven for 15 to 20 minutes.
Then cover edges of crust with foil and bake for an additional 20 to 25 minutes. (this prevents the edges from burning too much).
Let stand for a few minutes, then serve. 


What do you think? Comments? Suggestions? I would love to know that you visited my blog. Please leave me a message letting me know you were here! Did you try out a recipe? Let me know! I would love to hear from you :-)


Baby Shower Cake Pops

I recently helped plan out two baby showers this year and made some cake pops for each one. I made owl cake pops, baby boy cake pops, and pink & silver sprinkled cake pops. 

Here is a sneak peek of how they turned out. Stay tuned for multiple posts on the big events!


What do you think? Comments? Suggestions? I would love to know that you visited my blog. Please leave me a message letting me know you were here! Did you try out a recipe? Let me know! I would love to hear from you :-)


Related Posts Plugin for WordPress, Blogger...