Wednesday, August 8, 2012

Pretzel-Crusted Chicken

It was last summer and we went out to celebrate a friend's Birthday at Lancaster Brewing Company and I noticed Pretzel Chicken on the menu. I wasn't eating dinner so I didn't get a chance to order it, but someone in our party did, and it looked fabulous. When I went home and hunted for the recipe online I discovered it was a Rachel Ray recipe and it's actually in her Top 10. I've previously posted about Rachel Ray's Top 10 Recipes that I found through another blog back when I cooked & then posted about the Buffalo Chicken Chili that was on that list. The pretzel-crusted chicken is equally delicious. My husband & his friends have a deep frying night every once in a while. Things get out of control with deep fried pickles, and deep friend oreos, and just about deep fried anything. So the last time they did it I decided to test this chicken recipe out. It was easier than I thought and tastier than I thought.


Ingredients:
8, boneless, skinless, chicken breast tenderloins, uncooked
6 oz. bag of salted pretzels (I went with the extra dark - so good!)
1 tbsp thyme
salt & pepper
2 eggs
vegetable oil for frying
2 tbsp buttter
2 tsbp flour
2 cups milk
2.5 cups of shredded cheddar cheese
2 tbsp spicy brown mustard
1/4 cup parsley, diced very thin (optional)
1/4 cup onion, diced very thin (optional)
1 large sour pickle, diced very thin (optional)
1 lemon, cut into wedges

Make sure you have your supplies organized and your servings measured out so you can move quickly from step to step.

Make sure that the deep fryer is ready to go. (I don't have much experience with deep frying so my husband took care of this. Can't tell you how much oil we used or what temp it was on, sorry.)
You can always use a frying pan with oil and cook for a few minutes on each side that way, if you prefer. I prefer the deep fryer, it was so easy!

This chicken is the best when it is is thin & crispy. So the first thing you want to do is take a meat cleaver (or use an alternative plan such as the bottom of a pot) and hit the chicken breast until it lies flat & thin. 

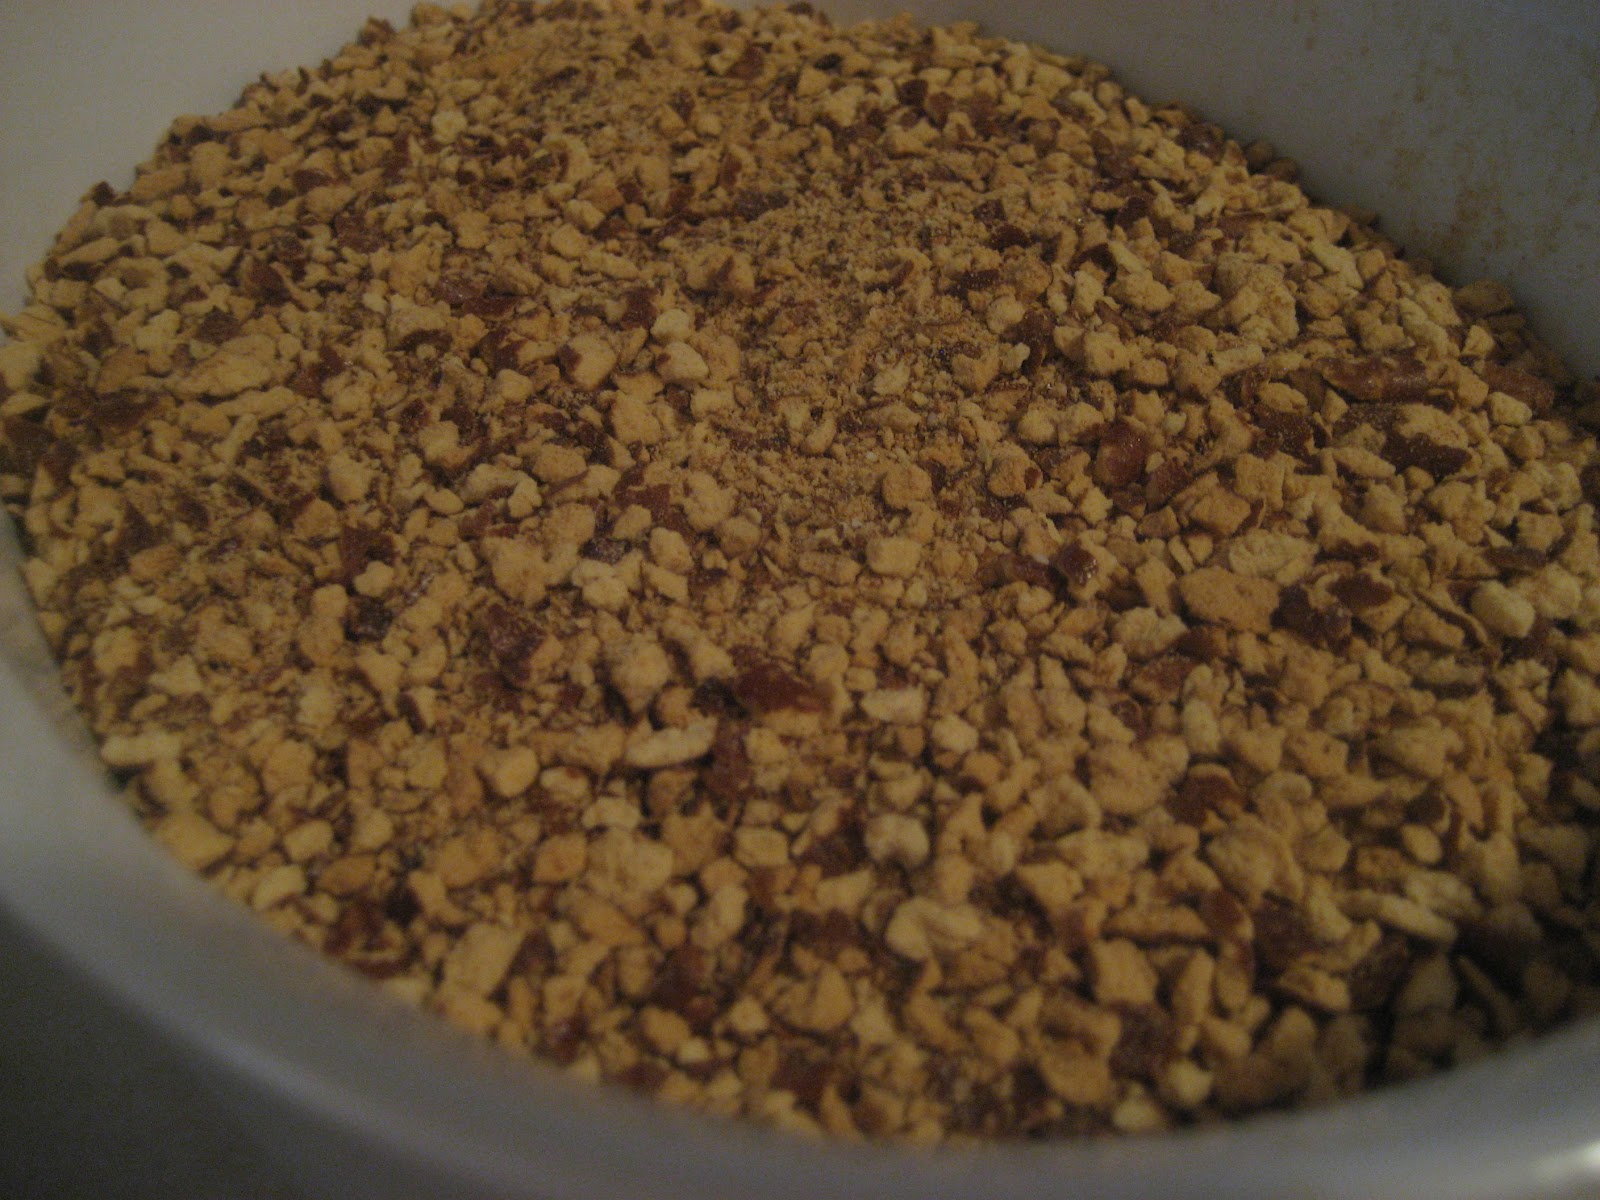
Meanwhile, grind the pretzels into fine pieces using a food processor. 
Transfer to a bowl and mix in thyme, salt, & pepper.

Crack, beat, and mix the eggs.
Transfer the pretzel mixture to a shallow dish that you can dip the chickens into and cover completely with the mixture.
But before you cover them completely with the pretzel mixture, dip them into the eggs.
Once both sides of the chicken breast is coated with the egg dip in the ground pretzel mix, covering completely. 

Then place carefully in the deep fryer and cook for a few minutes. 
The pretzel "breading" should be brown and the chicken should be cooked all the way through.

Meanwhile, while the chicken is cooking, quickly melt the butter and the flour (I would recommend having this stuff ready to go).
Cook for about 1 minute.
Then whisk in the milk. 
When the milk starts to bubble, then add the cheese & mustard.
Add salt & pepper, then remove cheese sauce from heat.

Remove chicken from the oil and place on a serving plate. Cover with the mustard cheddar sauce and feel free to sprinkle with some parsley. As well as the finely chopped onion & pickle. Serve with lemon wedges. 


I swear, THIS IS DELICIOUS!!!, so so so good. And easy if you have a deep fryer. 


What do you think? Comments? Suggestions? I would love to know that you visited my blog. Please leave me a message letting me know you were here! Did you try out a recipe? Let me know! I would love to hear from you :-)


Tuesday, August 7, 2012

Cupcake On A Stick

With the popularity of cake pops it seems like food-on-a-stick is all the rage now. I got these adorable flower-shaped tins from my mom and decided to play around with them. I was making Beach-Themed cupcakes for the school dance and had some extra batter, so I used the tins to make Cupcake-on-a-stick! 

They are called Blossom/Flower Cookie Pop Pans from Wilton and they are fun to play with. You are suppose to use them for cookies, but I went with cupcakes instead. Don't forget to spray with cooking spray before hand! (or grease the tins). I baked them for close to the same amount of time that regular cupcakes were called for, but I watched them carefully and took them out early. The amount of time you bake them depends on if you want to use a homemade cupcake recipe or use one from the box. Once your cakes have cooled, remove from tins, ice & decorate. You can always use a cake pop stand to display them!

What do you think? Comments? Suggestions? I would love to know that you visited my blog. Please leave me a message letting me know you were here! Did you try out a recipe? Let me know! I would love to hear from you :-)


Monday, August 6, 2012

Cookie Dough Cupcakes

Last summer I was vacationing with my sister-in-laws, my mother-in-law, and all 5 of my nieces. It was an awesome time. We had a lot of fun, but at the end of the day, we definitely needed a reward and time to relax. One night for dessert I made cookie dough cupcakes and with the extra batter I made a cookie dough cake. 

You might find some recipes for this online at allrecipes.com or all over if you google the idea. Lots of good recipes out there and lots of pretty images out there :-)  The recipe I came up with is a super easy version of all other recipes out there. I know these cupcakes/cake would taste super delicious if I made the cookie dough from scratch and the cake batter from scratch as well. 

But if you recall I made this at the beach while helping to take care of 5 little girls UNDER the age of 3. I wanted to spend my evening relaxing and not doing so much baking. I went with pre-made tube of Nestle Toll House cookie dough and a box of Duncan Hines and it still came out yummy. The following recipes makes 12 cupcakes and one small cake in a 8 x 8 square pan or about 24 cupcakes instead.

Ingredients:
1 box of cake mix (I used the yellow kind) 3 eggs (or whatever the box says you need) 1 1/3 cups of water (or whatever the box says you need) 1/3 cup canola oil (or whatever the box says you need) 1 tube of cookie dough (You can use the 30 oz tube to make larger size cookie dough balls) Tub of frosting (I went with chocolate) Cupcake liners Chocolate sprinkles (optional)


Before you do anything else roll the cookie dough into 24 small round balls. Place on a lined cookie sheet with freezer paper/wax paper and place in freezer for 2 hours.
VERY IMPORTANT - The cookie dough must be frozen for this to work!
Preheat oven to 350 degrees.
Mix the box of cake mix with the proper ingredients in the mixer until smooth.
Line a muffin tin with 24 cupcake liners. 
Pour in the batter.
Then place a frozen cookie dough ball in the center of each uncooked cupcake.
Place in the oven and cook for about 16 to 20 minutes.
Be careful not to overcook or the cookie dough will be dry inside.


This is my mom's awesome retro mixer from the 70's! Still works and looks really cool!


What do you think? Comments? Suggestions? I would love to know that you visited my blog. Please leave me a message letting me know you were here! Did you try out a recipe? Let me know! I would love to hear from you :-)

Friday, August 3, 2012

Low Country Slop Fest!

Over Memorial Day Weekend our friend held a low-country slop fest at his house and it was PHENOMENAL. We decided to do a low key one at our house for my Birthday this year. This is a great (EASY) feast when cooking for a large group. The best part? You don't need plates & if you use a plastic throw away tablecloth then clean up is soooo easy!


Ingredients:
Big ole bag of white or yellow onions
Big ole bag of potatoes (at least 1 per person)
Plenty of corn on the cob (at least 1 per person)
2-3 packages of sausage (we used different kinds, hot italian sausage, turkey sausage, kielbasa)
2 bags of frozen shrimp (it can be cooked or uncooked, you may have to adjust how long you boil the shrimp based on the instructions on the bag)
2 regular size containers of old bay
4 green bell peppers (optional)
a bushel of steamed crabs (optional, to serve with the slop later)


Directions:
Fill the largest pot in your house with water and dump an entire container of old bay inside. (One pot may not be big enough, so you might need to do two) 
Bring the pot of water with the old bay to a boil.


Meanwhile...after shucking & cleaning the corn, cut into thirds.
Cut the potatoes into quarters. (I kept the skins on, but just made sure they were rinsed & clean)
Cut the onions into big bite-sized pieces.
Cut the sausage into about 1 inch pieces.
Once the pot starts to boil place the potatoes, (peppers), corn, & onions  in first and let them boil for about 10 minutes.
Then add the sausage & shrimp. 
Cook for another 10 minutes.
Watch as you boil. You don't want the onions, peppers & potatoes to get too soft or soggy. 
If the sausage & shrimp are cooked through then drain the water from the pot, really make sure all the water is gone. Use a strainer if you have one that is large enough. 
Then literally just dump the food onto a table (with a plastic tablecloth). 
Grab forks (plates are optional) and go to town!
Serve with the other container of old bay.
Other great sides? Pasta salad. The bushel of crabs. Cornbread. 
Good Food & Good Friends! YUM YUM YUM.

What do you think? Comments? Suggestions? I would love to know that you visited my blog. Please leave me a message letting me know you were here! Did you try out a recipe? Let me know! I would love to hear from you :-)


Thursday, August 2, 2012

Guacamole Spice Mix


I love guacamole. I've been making it for a while now. A couple years ago when I started this blog I wanted to start making fresh guacamole and didn't quite know where to begin. After enlisting some help, I decided I didn't want to just use a regular mix packet from the grocery store like I did with my first attempts. So after some trial & error and extra help from my mom I think I've perfected my guacamole, for now.


Here's the recipe we use to make dry guacamole spice mix at home (it should make 10+ batches or 20 haas avocados worth of guacamole)


Ingredients For Mix:
3 tbsp of kosher salt or sea salt
2 tbsp of onion powder
2 tbsp of garlic powder
4 tbsp of ground cumin
2 tsp of cayenne pepper (or more if you want it more spicy)


Ingredients For Guacamole:
2 haas avocados
1 tbsp of above mix
1 tbsp of fresh minced garlic (if you love garlic like I do!)
1 tsp of lemon juice (optional)
1 tsp of lime juice (you can use more if you like, I don't like it so mushy)
1/2 cup of thinly diced red onion (use a food processor)


What do you think? Comments? Suggestions? I would love to know that you visited my blog. Please leave me a message letting me know you were here! Did you try out a recipe? Let me know! I would love to hear from you :-)


Thursday, July 12, 2012

Lettuce Wraps

These Asian lettuce wraps with chicken were inspired from, of course, skinnytaste. But that recipe required a lot of random ingredients. I wanted to keep it simple and cheap. (on a budget & time crunch) So I limited the ingredients needed. They were fun to make, fun to eat, and of course, DELICIOUS! I served with the Tomato Soup/Spaghetti Squash, it was a FANTASTIC meal!


Ingredients:


  • 2 or 3 4 oz chicken breasts, grounded
  • 1/4 cup water chestnuts, chopped fine
  • 2 tbsp diced green onions
  • 2 tbsp soy sauce 
  • 1 tbsp oil
  • 1 tbsp white wine
  • 1⁄2 tsp sugar
  • freshly ground white pepper, to taste
  • 2 cloves garlic, minced
  • head of lettuce, or as many leaves as you need


Directions:


If your chicken isn't already ground you can place it in a food processor (or even a blender will do) and ground it up. It's actually kind cool that it works that way. Or you can buy ground chicken (8 to 12 oz) at the store.
Place the ground chicken in a bowl.
Meanwhile mix soy sauce, olive oil, wine, sugar, & pepper. 
Mix water chestnuts, garlic & onions in with the ground chicken.
Then pour soy sauce mixture over chicken.
Let it marinate for a few minutes.
Make sure it is well mixed (feel free to use your hands if needed)
Add more soy sauce, wine, or oil, if needed.
Transfer to a medium sized frying pan (or wok)
Cook until brown, 5 to 10 minutes, and feel free to add more oil if desired.
Break up and stir meat as you go.
Place in each lettuce wrap and serve with a dipping sauce, if desired. (I eat mine with Ranch!)


What do you think? Comments? Suggestions? I would love to know that you visited my blog. Please leave me a message letting me know you were here! Did you try out a recipe? Let me know! I would love to hear from you :-)


Wednesday, July 11, 2012

Spaghetti Squash & Tomato Soup

This is a great, hearty, healthy, satisfying meal. Lately I've been cooking a lot with spaghetti squash and really enjoy it. If you don't need to carbo load, then you can replace any spaghetti recipe with spaghetti squash instead to keep the calories down. It's high in fiber and has about 40 calories per cup. I find it to be very very filling. It's hard for me to eat more than 2 cups of it. The result is always yummy. 


At the beginning of the summer some girlfriends & I spent a week together down at the beach. We took turns cooking for each other and for my dinner meal I made lettuce wraps coupled with this spaghetti squash covered with tomato soup.


I got the lettuce wraps recipe from one of my favorite recipes blogs: skinnytaste. The tomato soup w/ spaghetti squash recipe idea was a combination of other recipes I've made and a montage of recipes from allrecipes. Again, let me emphasize how filling and yummy this meal was! It makes 4 to 6 servings.


Ingredients:
  • 1 large spaghetti squash
  • 3 cans of crushed tomatoes
  • 2 cups of fat free chicken stock
  • 2 cups of heavy whipping cream 
  • 2 tbsp of butter
  • 1 tbsp of italian seasoning
  • salt & pepper to taste
  • garlic powder (optional)
Directions:
Before doing anything else get the Spaghetti Squash started. There are different strategies to preparing & cooking spaghetti squash. Some prefer to cook the spaghetti squash first, then cut it in half. That may be safer when dealing with the knife, but then you have to handle a hot spaghetti squash. I'm not a fan of that. So pick the lesser of two evils for you and go with it. 


Here's what I do...
Cut in half, (it's really really hard to do with a sharp knife before it's been cooked, so BE CAREFUL! I use a "wiggle" method on both sides and crack it in half. It could be dangerous, so if you aren't having any luck just put it in the oven whole and cut and scrape later) scrape out seeds & guts, season with salt, pepper and garlic powder, and cook for about an hour in a preheated oven at 375 degrees, with the two halves facing upward. 

When there is about 10 to 20 minutes left, combine the tomatoes, chicken stock, whipping cream, butter, and italian seasoning in a large pot. 

Bring to a boil, lower the heat, then simmer for 10 to 15 minutes.  Add salt & pepper to taste. If you want the soup a certain consistency feel free to put chicken stock & tomatoes in a blender before bringing to a boil or after you lower the temp feel free to use an immersion blender. I love those things!

Remove spaghetti squash from oven scrape out what's left. Place evenly in 4 to 6 bowls.  Top with more seasoning if desired. 

Cover each bowl with soup. Want to make it better? Add homemade croutons, a dollop of sour cream, or shredded cheese. ENJOY!


What do you think? Comments? Suggestions? I would love to know that you visited my blog. Please leave me a message letting me know you were here! Did you try out a recipe? Let me know! I would love to hear from you :-)


Wednesday, April 18, 2012

Asian Broccoli Slaw Salad

This is a fabulous, filling salad that I often make for dinner (about once a month) that my husband enjoys. It's delicious! My favorite part is the homemade dressing. I also like making a lot of it so I can eat leftovers for lunch the next day and the rest of the week.


Ingredients:
6 oz cooked, grilled chicken, shredded
1 container of Broccoli slaw (you may be able to find some in bags by the lettuce, but Darrenkamp's sells them in pre-packaged containers by the pre-diced onions)

8 green onions, diced (i love green onions)
1.5 cups of celery, diced (Darrenkamp's also sells these pre-chopped)
1/2 cup peanuts
1 small can of chow mein noodles
1 package oriental ramen noodles, broken up (set aside the seasoning packet)
1/2 cup sugar
1/4 cup white vinegar
1/2 cup peanut oil
2 tbsp soy sauce
2 tbsp thai peanut sauce


Directions:
Mix chicken, slaw, green onions, celery,  peanuts, noodles, and ramen noodles in a medium bowl.
Mix sugar, vinegar, oil, soy sauce, and half of the ramen noodle seasoning in a jar with lid. 
Shake well and pour over slaw/salad.
Top with peanut sauce, making sure it gets mostly on the chicken. 


What do you think? Comments? Suggestions? I would love to know that you visited my blog. Please leave me a message letting me know you were here! Did you try out a recipe? Let me know! I would love to hear from you :-)


Tuesday, April 17, 2012

Baked Turkey Croquettes


I shouldn't be posting this in the spring time because it's ideally the perfect post-Thanksgiving meal to use with your leftover turkey & mashed potatoes. So bookmark this and bust it out in November, please.

Ingredients:
3/4 lb of turkey (cooked & shredded thin)
3 potatoes, peeled, cooked, & mashed
3/4 cup fat free chicken broth
2 tsp olive oil
4 cloves garlic
1 medium onion, diced
1/2 cup fresh parsley, chopped
1/2 cup seasoned bread crumbs
1 egg
salt & pepper, to taste
fat free olive oil spray
Directions:
Preheat oven to 450 degrees.
Mash potatoes in with 1/4 cup of the broth.
Add salt & pepper.
In a medium sauce pan, heat oil on low heat. 
Saute garlic & onions for a few minutes. Add parsley, more salt & pepper, and cook until soft for a few more minutes. Add turkey and remaining broth.
Mix well, then remove from heat.
Then add the turkey to the mashed potatoes. 
Use your hands to mix them together.
Add more salt if needed.
Scoop out the mixture, 1/4 cup at a time and form the oval croquettes.
Place each on waxed paper. 
Meanwhile, break & whisk egg and dip each croquette into the egg wash. From there dip into the breadcrumbs that are placed in a shallow dish.
Then place on a lined cookie sheet (parchment or tin foil). Spray with olive oil spray generously. Bake in oven for about 15 minutes, or until golden brown.


What do you think? Comments? Suggestions? I would love to know that you visited my blog. Please leave me a message letting me know you were here! Did you try out a recipe? Let me know! I would love to hear from you :-)

Monday, April 16, 2012

Irish Beef Pies

I love Martha Stewart freezer recipes. I think all of her recipes are great, but they are always so involved, so when a good/simple one comes along, I embrace it. These Irish Beef Pies are easy to make ahead and serve for dinner during the week. There are great ways to enhance this recipe by adding garlic or paprika. But this is the traditional "Irish" pie recipe. I also would want to add onions or corn. Maybe some other veggies like carrots or celery but that's your call. Great recipe, makes 8 at a time. 


Ingredients:
1 tbsp vegetable oil
1 head of cabbage (won't need all of it)
1 lb ground beef sirloin
1/2 lb red potatoes
1 tbsp of tomato paste (you can use more, but i'm not a fan)
1 tsp Worcestershire sauce
1 cup of water
1/2 tsp thyme
salt & pepper
2 pie crusts 

Directions:
Preheat oven to 400 degrees.
Shred the cabbage and cut the potatoes into tiny cubes.
In a sauce pan heat oil over medium heat.
Add cabbage & potatoes.
Cook for about 8 minutes until brown.
Then add beef and break up while cooking.
When they are no longer pink stir in tomato paste, worcestershire sauce, thyme, & water.
Cover, lower heat, and cook for about 15 minutes.
The potatoes need to be soft enough to mash.
After mashing with a fork season with salt & pepper.
Meanwhile, stretch out the pie crusts and split into 4 sections (use a pizza cutter).
Ideally you would want to make it more of a square then a circle, but I don't have time for that.
Place about 1/2 a cup of the filling on each square and seal up.
Crimp edges with a fork (if you're talented).

To Eat Now: Transfer pies to rimmed baking sheet (lined with foil) and bake for about 10 minutes or until golden brown. You can rotate the pies after 5 minutes for even cooking.

To Freeze: After the insides cool, wrap in tin foil and place in freezer bags. I kept them in my freezer for about a month and used them regularly. No defrosting needed. 

To Eat From Freezer: Bake at 400 degrees for about 30 minutes on a foil-lined rimmed baking sheet.


BEFORE BAKING:


 AFTER BAKING:


Nutritional Information:


Carbs: 7.5
Calories: 362
Fat: 20
Points: 8.6
Points Plus+: 10


What do you think? Comments? Suggestions? I would love to know that you visited my blog. Please leave me a message letting me know you were here! Did you try out a recipe? Let me know! I would love to hear from you :-)

Related Posts Plugin for WordPress, Blogger...