Monday, December 20, 2010

This Week's Dinner Menu


I would love to know that you visited my blog or tried out a recipe. Leave me some love & encouragement!

Thursday, December 16, 2010

Crock Pot Tuscan Pasta

Stumbled across this recipe on more than one website. Decided to give a try. It worked out very well and I'm a big fan of leftovers it created for lunch the next day (and the rest of the week). It was almost too much for my smaller crock pot. But the point is it is very easy to make. The basic ingredients are chicken, spaghetti, kidney beans, & tomatoes. But I wanted to make it better so I added zucchini, green pepper, roasted red peppers, pepperoni, & cheese. It's delicious and filling. Especially with a side of my husband's perfect garlic bread :-)


Ingredients:
  • 1 lb boneless skinless chicken breast, cut into 1 inch pieces
  • 1 15 oz can red kidney beans, drained
  • 1 15 oz can stewed tomatoes
  • 1 15 oz can diced tomatoes, drained
  • 1 large green bell pepper, chopped
  • 1 large zucchini, chopped
  • 1/2 cup of roasted red peppers
  • 1 medium onion, chopped
  • 1/2 cup celery, diced
  • 1/2 cup of turkey pepperoni
  • 2 cloves of garlic, minced or 1 tsp of garlic salt or 1 tsp of garlic powder
  • 1 cup water or 1 cup chicken broth
  • 2 tablespoons italian seasoning
  • salt & black pepper
  • 6 oz of uncooked spaghetti, broken into pieces
  • 1/2 cup parmesan cheese, grated or shredded

Directions:

  1. Combine all ingredients, except the spaghetti and cheese in medium sized crock pot and cook on low for 4 to 5 hours.
  2. Stir in spaghetti, cover & cook on High for 45 minutes to an hour, or until pasta is tender.
  3. Top with parmesan cheese before serving.
I would love to know that you visited my blog or tried out a recipe. Leave me some love & encouragement!


Wednesday, December 15, 2010

Mashed Potato Bar (aka Mash-tini Bar!)

My mom sends me links and emails from time to time. If she comes across a recipe she thinks I'll like or if she just comes across something cute she wants me to check out she'll send me a quick note about. Last month she told me to "google" Mashed Potato Bar because she had just seen a segment about it on the Today Show. Apparently, it's the new thing that catering companies or weddings are doing now. It's pretty cool! A lot of you may have heard of a Baked Potato Bar, but the Mashed Potato Bar takes it to a whole 'nother level. I really wanted to give it a try but was waiting for the perfect occasion to use it. We helped host a Christmas Party this past weekend and tried it out. Total success! It worked out well because a lot of people brought desserts and hours de vours, so it was nice to have the mashed potato bar to compliment them all. 

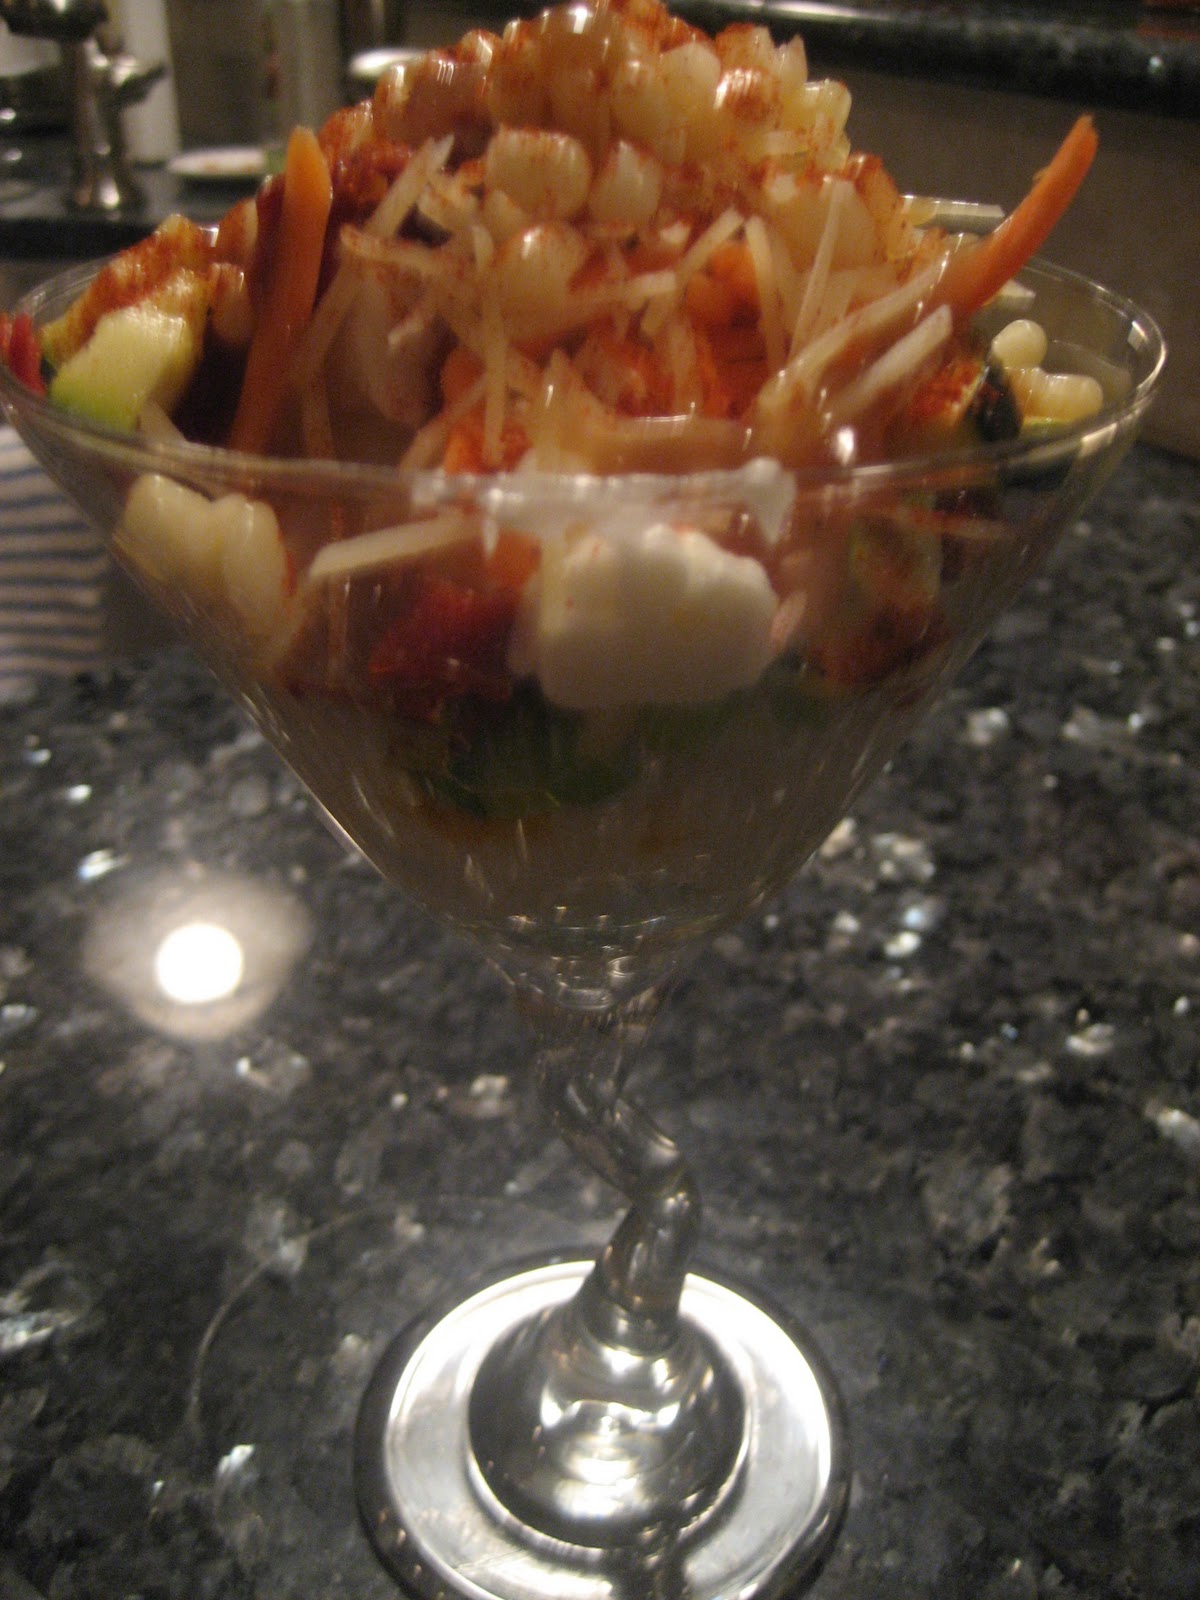
In reality, it's a real simple idea. Sophisticated simplicity, if you will. Mashed Potatoes are pretty easy to make. (well if you use instant like I did) Then you just select a variety of ingredients that you think your guests will enjoy with their mashed potatoes. The best part is you can use an icecream scoop and
serve them in martini glasses! Hence the name, Mash-tini Bar!!! It makes mashed potatoes look a lot fancier then they are and everyone loves the variety. We ran out of martini glasses so I used a variety of wine glasses. Check out the pictures!


Here are some ingredients I included:
Green onions
Shredded cheese
Roasted red peppers
Beef gravy
Chicken gravy
Sour cream
Diced tomatoes
Corn
Marinated zucchini
Bacon pieces
Turkey Pepperoni pieces
Paprika
Garlic Salt

What are your thoughts? What would you add to your Mashed Potato Bar?
Chili!
Melted Cheese!
Bacos!


Need more ideas? Check these out: San Diego CooksFrugal FairyProject Wedding.


My next challenge? I think I'm going to take on cake pops! Has anyone tried making these before??? Let me know if you are up for the challenge!


I would love to know that you visited my blog or tried out a recipe. Leave me some love & encouragement!

Tuesday, December 14, 2010

Chicken Pesto Pizza

I made Chicken Pesto Pizza for Cooking Club last week so that we had something to snack on while decorating & swapping cookies. It was a delicious mess! My secret ingredients??? Alfalfa Sprouts!


Ingredients:
  • 1 package of Purdue Shortcuts Original Roasted Chicken Breast Strips
  • 1 package of pesto seasoning
  • 1/4 cup olive oil
  • 3/4 cup water
  • 1/4 cup chopped onion
  • 1/4 cup chopped carrots
  • 1/4 cup chopped celery
  • 1 cup alfalfa sprouts
  • precooked pizza crust
  • 1 cup reduced fat cheddar cheese, shredded
  • 1 cup reduced fat mozzarella cheese, shredded
  • 1 cup parmesan cheese, shredded


Directions:
1. Preheat oven to 450
2. Spray pizza crust with olive oil 
3. Prepare pesto seasoning in sauce pan with water & olive oil, stirring frequently to create pesto sauce. Bring to a boil and simmer for 5 minutes. You may want to add flour or corn starch to make thicker, but be careful to not make it lumpy.
4. Turn off heat and mix in chicken with pesto sauce, stir completely.
5. Spread pesto mixture on pizza crust.
6. Add vegetables and sprouts.
7. Top with 3 time of cheeses.
8. Bake in oven for 10 to 20 minutes until brown & bubbly.


I would love to know that you visited my blog or tried out a recipe. Leave me some love & encouragement!

Monday, December 13, 2010

This Week's Dinner Menu


I would love to know that you visited my blog or tried out a recipe. Leave me some love & encouragement!

Saturday, December 11, 2010

Creme De Menthe Squares

Probably my favorite dessert of all-time. It's one of the only things I remember from Christmases growing up :-) And that we left Beer and M&M's for "Santa Claus" rather than milk & cookies (you think I would've known a long time ago that Santa wasn't real!).


Cooking club had a cookie exchange this month. Did I mention I ADORE my cooking club??? Did I mention I have the most amazing cooking club EVER??? We are so fun together! The plan was to bring some cookies to exchange or an appetizer to eat. I brought chicken pesto pizza along with my creme de menthe squares. But others brought sugar cookies & ginegerbread cookies already made that we decorated together during the evening. That was a fun little project and a cute idea. And did I mention we all had to wear aprons??? Best part!


There was a prize for best cookie & best apron. Best cookies went to the Peanut Butter ones by Amanda. You can't really compete with PB, can you?


My mom was in town earlier this week and we made the Creme De Menthe squares together. After I made her chicken pot pie for dinner. You know it's a special recipe when you get to bust out your Kitchen Aid mixer! It was a very long process. So long that I had to call it quits and go to bed. Luckily, my mom finished it for me. The final results were fabulous! So fabulous that I made another pan the next night!!!


INGREDIENTS:


Brownie Layer
  • 1/2 cup softened butter
  • 1 cup sugar
  • 4 eggs, beaten
  • 1 tsp vanilla
  • 1/2 tsp salt
  • 1 cup flour
  • 1 can Hershey syrup


Mint Filling


  • 1/2 cup softened butter
  • 2 cups confectioner's sugar
  • 3 tbsp green creme de menthe
  • green food coloring (if you want it a darker green)
  • mint cake gel (if you want it extra minty)


Chocolate Glaze
  • 6 oz semi sweet chocolate chips
  • 6 oz melted butter


DIRECTIONS:
  1. Preheat oven to 350 degrees
  2. Cream butter & sugar until smooth.
  3. Add beaten eggs, one at a time, mix thoroughly.
  4. Add vanilla, salt, and flour. Mix until well blended.
  5. Add Hershey syrup. Mix well.
  6. Pour into greased 13 x 9 baking pan. Bake for 30 minutes or so. Then cool completely.
  7. Cream butter & confectioner's sugar until smooth with a mixer.
  8. Add Creme de menthe and mix thoroughly until of spreading consistency. 
  9. Frost brownie layer with the mint filling (ONLY IF BROWNIE LAYER IS COMPLETELY COOLED)
  10. Refrigerate to harden mint layer. Approximately 20 minutes or more.
  11. Melt butter & chocolate chips over low heat. Stirring constantly until smooth.
  12. Cool to room temperature. Spread over mint filling covering entire layer. 
  13. Cool until glaze hardens. Cut into squares before serving.

I would love to know that you visited my blog or tried out a recipe. Leave me some love & encouragement!


Friday, December 10, 2010

Low Fat Chicken Pot Pie

Everyone loves Chicken Pot Pie, but it can be REALLY bad for you. Have you ever looked at the nutritional information??? It's a shame too, because you can get pot pie from the grocery store for super cheap. Plus it's just plain delicious. Perfect comfort food meal and perfect for winter time. I came across this weight watcher recipe and made it for my mother while she was in town. I also made enough for 2 dishes so I could freeze one. Gotta love that freezer! So, this recipe tastes good and you can eat it without feeling bad about yourself. But the best part is that it's quite simple to make. Enjoy!


Ingredients:
  • 1 cup reduced fat Bisquick
  • 1/2 cup skim milk
  • 1/4 cup egg substitute
  • 2 cups frozen mixed vegetables
  • 1 lb. skinless chicken breast, cooked & chopped
  • 2 cans Campbell's Low Fat Cream of Mushroom Soup (I hate mushrooms so I used a can of Cream of Chicken instead)
  • Cooking spray

Directions:
  1. Preheat oven to 400 degrees
  2. Spray 7.5 x 11 casserole dish with cooking spray
  3. Mix veggies, chicken, and soup in a medium sized bowl
  4. Pour into casserole dish
  5. In a separate bowl, mix Bisquick, milk, & egg substitute
  6. Pour dough mix over the top of chicken mixture
  7. Bake for about 30 minutes or until crust is golden brown


I would love to know that you visited my blog or tried out a recipe. Leave me some love & encouragement!

Wednesday, December 8, 2010

Skinny Chili Cheese Fries


One of the bloggers I follow, Heather, made a youtube video on how to make Skinny Chili Cheese Fries and it's one of my favorite dishes to make. My husband really likes them too. There is something fun about making them, Heather's recipe is neat because of her secret ingredient. The best part is they are relatively healthy so I can feel good about myself. Our good friends, Jess & Drew just had a baby girl several days ago. Instead of bringing over a meal, we brought over the ingredients and made the meal while visiting with the baby. It was great. Here is the recipe we used to feed the four of us with some leftover. Delicious!


Ingredients:
  • 4 - 5 potatoes (go with a potato per person)
  • 2 - 3 tsp of olive oil (you can go with 1 tsp per 2 potatoes)
  • 2 cans of Turkey Hormel Chili (or another low fat/fat free can of chili)
  • 1 can of chili packet seasoning
  • 2 cups of shredded fat free cheddar cheese or 1/2 cup of cheese per person (you can use 2% or regular cheese, but fat free works because you don't have to melt it)
  • salt & pepper (we went with kosher salt!)
  • 10 - 12 ice cubes
  • 2 1 gallon ziplock bags 
  • 2 cookie trays/baking trays with ridges
  • 2 very large sheets of Tinfoil


Directions:
  1. Preheat ove to 450 degrees.
  2. Slice each potato into 8 to 10 french fry wedges
  3. Divide potatoes into each ziplock bag.
  4. Add olive oil to each bag.
  5. Split contents of chili among both bag, then seal bag & SHAKE SHAKE SHAKE! (see, told you it was a fun recipe!).
  6. Make sure oil & chili seasoning is mixed up nicely and evenly among all the fries.
  7. Take out fries and spread out among cookie sheets/baking sheets.
  8. Now take all the ice cubes and spread them out intermittently among the french fries so they cover all areas of both cooking sheets.
  9. Wrap up each tray with tinfoil cover tightly and seal edges.
  10. Bake both trays in oven for 20 minutes. The ice cubes & tinfoil will STEAM the potatoes, so they cook without getting burnt!
  11. Remove from oven, remove tinfoil, rotate potatoes to other side, sprinkle with salt & pepper.
  12. Place bake in oven uncovered and cook to make them crispy.
  13. Bake for another 20 minutes, could be 10 minutes, could be 30...watching to see how crispy you want them and that they don't burn.
  14. Remove from oven, top with chili & cheese and enjoy!
I would love to know that you visited my blog or tried out a recipe. Leave me some love & encouragement!

Tuesday, December 7, 2010

Slow Cooker Pizza

I love Slow Cooker Saturdays! (Except when I forgot to defrost the ground beef) I try to freeze stuff more to prevent food from spoiling, but it always backfires on me because I forget to take out the food in time. Oh well. I still made it work. I prepared the recipe in the morning and let it sit in the fridge right there in the crock-pot. Then went to work to get some things done. My husband came home with the Christmas tree around 1 and all he had to do was plug in the crock pot and turn it on. It was perfect & easy. Dinner was ready when I walked in the door @ 6PM.  This is a great recipe because it uses so few ingredients. It takes a little time to prepare, especially when you have to cook frozen ground beef in your skillet while cooking the pasta. But it was great and really does look like slow cooker pizza! 

Thoughts? What could I add to improve this recipe? I stole this from AllRecipes.com and didn't make much changes. I know it could use more veggies! What do you think?


Ingredients:
  • 1.5 pounds of extra lean ground beef
  • 8 oz of pasta (I used elbow macaroni)
  • 1.5 or 2 15 oz cans of pizza sauce
  • 1 19 oz can of cream of tomato soup (I used creamy tomato basil soup from Progresso)
  • 1 package of turkey pepperoni, about 30 slices.
  • 1 - 2 cups of part-skim mozzarella cheese
  • Italian Seasoning

Directions:
1. Boil salted water and cook pasta according to box directions.
2. Brown ground beef in skillet and drain, if necessary.
3. In medium sized slow cooker alternate layers of ingredients: Ground Beef, Italian Seasoning, Pasta, Cheese, Soup, Sauce, Pepperoni Slices. You should be able to make 3 layers. 


4. Top with additional cheese or ingredients, if desired.
5. Cook on low for 4 hours.


I would love to know that you visited my blog or tried out a recipe. Leave me some love & encouragement!

Monday, December 6, 2010

Crumble Apple Pie

I had an urge to make apple pie (I don't usually bake) because a couple pictures of apple pies popped up on AllRecipes.com when I was looking for recipes this week. So I found a simple recipe for apple pie and made one, then it turned into two. :-) This is really easy, especially if you use an already made pie crust, or the graham cracker pie crust that I usually use.

I had a lot of leftover apples, plus extra ingredients lying around so I decided to make another. However, I only had one pie crust, so I went ahead and just made pie crust from scratch.  I've never done it before. Don't get excited, it wasn't pretty or anything, but it was still fun. I haven't mastered that whole pretty criss-cross crust covering. 


I would've tried but I ran out of dough. Also, the results did not turn out to well in the edible-sense. The graham cracker crust version was really good. But I thought that the homemade pie crust tasted & smelled funny. Of course my audience was too polite to admit it. But it left a weird after taste. Do you think it was the amount of shortening I used? It called for 2/3 cups. I felt like I could taste the shortening. It tasted really bitter. Or maybe it was the flour? I heard that flour can go bad if you have it for too long. Is that true? Well, whatever it was, better luck next time. 


YOUR TURN: Help! Do you have any good pie crust recipes that you've used? Have you mastered the criss cross technique? I'd appreciate any pie crust advice! Thanks.


Below is the recipe for the apple pie with already made pie crust. ENJOY!


Ingredients:
  • graham cracker pie crust
  • 3 granny smith apples, cubed
  • 1/3 cup sugar
  • 3 tablespoons cornstarch
  • 1 teaspoon ground cinnamon
  • 1/4 teaspoon allspice
  • 3/4 cup fat free sour cream
  • 1 teaspoon vanilla extract
  • 1/4 cup all-purpose flour
  • 1/4 cup of graham cracker crumbs
  • 1/4 cup packed brown sugar
  • 1/2 teaspoon ground cinnamon
  • 2 tablespoons cold butter
Directions:
1. Preheat oven to 400 degrees.
2. Combine apples, sugar, cornstarch, cinnamon and allspice in a bowl.


3. Combine vanilla and sour cream. Add to apple mixture.


4. Spoon into pie dish or pie crust.


5. Combine the flour, graham cracker crumbs, brown sugar, and cinnamon into a another bowl. 
6. Cut in butter until mixture becomes coarse crumbs.


7. Top the apple mixture with the crumb mixture.
8. Bake at 400 degrees for 25 minutes. 


9. Lower temperature to 350 degrees and cook for an additional 20 to 30 minutes. Top should be golden brown and filling should be bubbly.

I'm trying to be more organized in the kitchen. Whenever I set out to make a new recipe I tend to make a whole mess and then leave it for my husband to clean up after me. I tried to be more organized today by measuring everything out ahead of time. Ya know, like they do on those cooking shows??? Yeah well, that lasted all about 5 minutes. But it felt good for those 5 minutes. 


I would love to know that you visited my blog or tried out a recipe. Leave me some love & encouragement!

Sunday, December 5, 2010

Turkey Hash


Once a month we have an "open house" with our parents & students who are on the Gold Team. (I'm the Gold Team math teacher). We get together and answer any questions or concerns that our students' parents may have and then let them know what to expect during the school year. It's actually been really cool and a nice way to meet the parents. This month we did a potluck dinner. I had forgotten all about it until the day before so I just decided I would make the Turkey Hash casserole that I was planning on making for dinner that night anyway. I had to stay late after school to get my lesson ready for Friday, then I was running around all afternoon doing errands for church. I got home later than I would have wanted to. But I quickly got to work making the dish. I had all 4 burners going on the stove at the same time. I was boiling the potatoes, sauteing the onions in chicken stock, boiling the turkey breasts, and cooking the frozen peas/carrots all at once. It was quite comical to watch me, I'm sure. Plus I stink when it comes to potatoes. I don't really know what i'm doing. I had to google "how to cook potatoes". Then I had to try to cut them into cubes while they were still really really hot. It wasn't working, it was taking forever. I was taking them in and out of the boiling water trying to make it work, with a fork. They weren't cooked all the way, but I was still trying to cut them. It was basically a really awkward game of Hot Potato and I was the only one playing (and losing). Also, I usually buy precut celery & precut onions from Darrenkamps every week, which makes my life so much easier -- in the kitchen at least. This week we shopped at Giant because Darrenkamps is closed @ 11PM on Saturday nights. (which is really the only time they are ever closed) They don't have precut onions. So on top of my wasted time with the potatoes I had to spend excess time cutting onions, which I'm not any good at either. You'd think it's no big deal to chop an onion every now and then, but I cry like a baby every time. (Not because it's emotional, but because the fumes get to my eyes and I start crying a lot). So to make a long story short, I took forever to prepare the dish and then realized I had 25 minutes to get back to school in time for the gathering and the recipe called for 30 minutes in a preheated oven. I couldn't be late but I didn't want the food to go to waste. 


So, I took the prepared dish, covered it and left a note for my husband, "Be home late. Cook for 30 minutes @ 350...ENJOY!" I wound up stopping at Weis grabbing Chipotle Chicken Salad & Hummus and that was my contribution to the meal. It all worked out--my husband enjoyed the dish, there was a TON of food at the potluck, and I got to eat the leftovers of my turkey hash the next day for lunch. Don't you just love happy endings?


Suggestion: I didn't have enough potatoes, so I used some leftover Ore Ida Tater Tot Potatoes that I had in the freezer. I highly recommend using them instead of potatoes!


Ingredients:
  • 1/4 cup chopped onion
  • 3 cooked & diced potatoes
  • 3 tablespoons of chicken stock
  • 1 10 oz bag of frozen peas & carrots
  • 1 can of low fat cream of celery soup
  • 3/4 to 1 pound diced cooked turkey
  • 1 cup low fat shredded cheddar cheese
  • paprika


Directions:
  1. Saute onion in chicken stock in a large nonstick skillet until tender.
  2. Add turkey, soup, potato and peas.
  3. Place mixture in 1 quart nonstick casserole.
  4. Top with shredded cheese & paprika.
  5. Bake at 350 degrees for 30 minutes.


I would love to know that you visited my blog or tried out a recipe. Leave me some love & encouragement!
Related Posts Plugin for WordPress, Blogger...